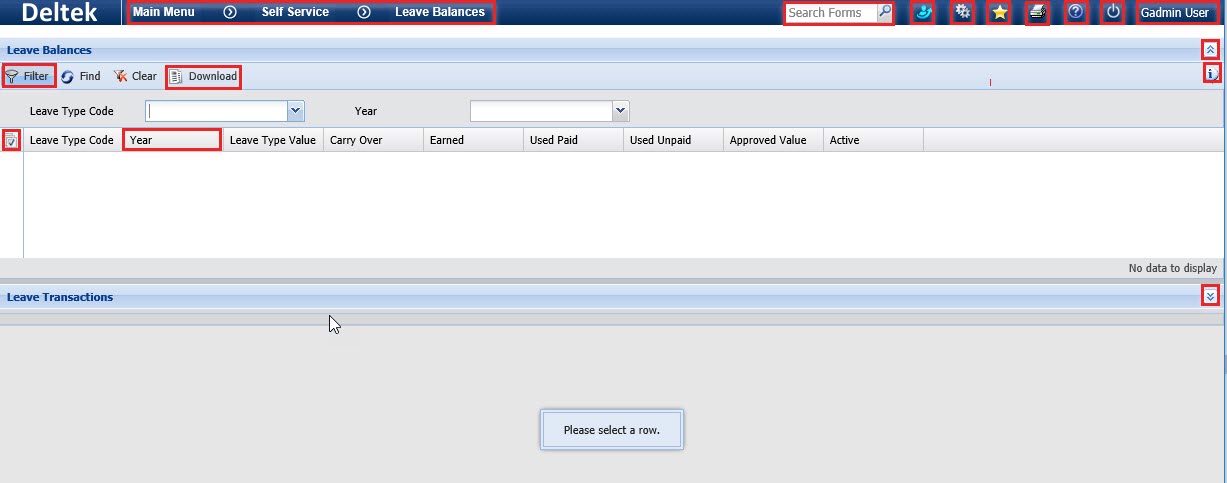
After you have logged in to the application, your default form will display. The default form is defined in your Form Profile.
In the illustration below, the Leave Balances form is displayed. Each item outlined in red is described in the table below the image.
Item |
Description |
The menu bar at the top of the window displays the path to the form you are currently viewing. Click the Main Menu to display the submenus and navigate to a different form. You can also open a form using the Search field or the Favorites icon.
|
|
|
|
You can use the Search field at the top of the application window to navigate to a form without going through the Main Menu. Type the name of the form you want to display in this field. When you begin typing, a list of matching forms will display so you can select the form you want. When you select the form name, it will display on screen. You can also click the magnifying glass icon to display a list of the available forms, and select the one you want to display.
|
|
|
If another supervisor has delegated authority to you, you can use the Act As icon to select a supervisor to act as. When you act as another supervisor, you can review and modify the records of that supervisor’s employees. Selecting a name from the Act As icon is the same as using the Start Acting As button in the Act As form. The Act As icon will only be visible if you have the Act As form enabled in your Security Role.
|
|
|
Displays the Preferences form, which can be used to change the way data is displayed on the timecard. You can also access this form from the Self Service menu (Main Menu > Self Service > Preferences).
|
|
|
The Favorites menu is used to quickly access the forms and events you use frequently. To view the Favorites menu, click the
See Favorites for information on adding, deleting, modifying, and rearranging Favorites.
|
|
|
Use the Print button to print a screenshot of the page that is currently displayed. Click the Print button to display your web browser's Print window.
|
|
|
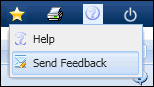
The Help button displays the online help topic for the current form. You can go to another Help topic using the Index, Search, and Table of Contents in the online help. If the Send Feedback form is enabled in your Security Role, the Help button will display a Send Feedback option in addition to the Help options.
|
|
|
To log out of the application, click the Log Out button. The Login page will display. See Log In/Log Out for more information.
|
The name of the user who is currently logged into the application will appear next to the Log Out button. This field will display the user's First Name and Last Name as defined on the Employee form.
|
|
|
|
The Filter button is used to show and hide the form's filter fields. The filter fields allow you to display records with specific values. By default, the filter area is not visible on a form until you click the Filter button. However, you can change this global setting - using the Form Settings tab in Form Profile - so that the filter area displays by default whenever the user opens a form.
|
|
|
Click the Select All button to select all records in the form at once.
|
|
|
When you move your
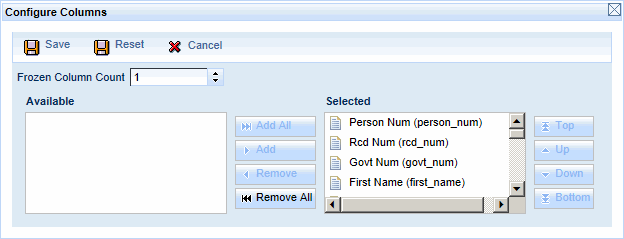
cursor over a column in a form, it may display an arrow icon Some forms include the Configure Columns button
You can also change the Frozen Column Count. Frozen columns are columns on the left side of the form that will remain visible when you scroll the form with the horizontal scroll bar. The Configure Columns button
|
|
|
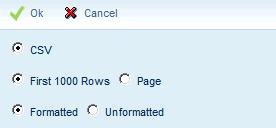
The Download button is used to download the data in the current form to a .csv file. Use the form’s Filter fields to display the records you want to download in the form. The maximum number of records that will appear in the form is based on the number_of_records setting in Form Settings or the max_supervisor_records Application Setting. When you click the
When the .csv file is ready, your web browser will display a message asking if you want to open or save the file. Open the file to view it immediately or click Save to save it to disk. The maximum number of records that will be included in the .csv file will depend on your max_download_records Application Setting. In some forms, the
|
Show/Hide Master and Detail Sections
|
When a form includes a detail tab, it will display on the lower half of the screen. The detail tab typically displays information about the record currently highlighted in the top (master) form. Use the You can also drag the horizontal bar Some forms may display the following controls in the middle of the form:
To maximize the top (master) form and hide the
bottom (detail) tab form, click the DOWN arrow. To maximize the bottom (detail) tab form and
hide the top (master) form, click the UP arrow. To display both the top (master) form and the
bottom (detail) tab form, click the Split View line in the middle.
If a form has more than one detail tab, the tab
that appears active will be the tab that was displayed by the
last user. Currently this feature only affects forms that have
an info button
|
|
|
If a form has an info
button (
|
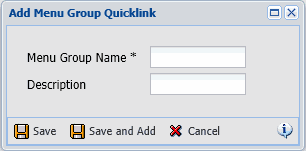
Required Fields (*) |
When you are adding or modifying a record, or posting an event in the web timecard, an asterisk (*) next to the field name indicates it is a required field. You must enter a value in the field in order to save the record.
|
In some forms, the current page number/total number of pages displays at the bottom of the form when the there are multiple records to view.
You can use the arrow buttons to navigate between the pages. You can also change the number of records you want to view on each page (Rows per page). The maximum Rows per page is 50. The default Rows per page is 20. You can change the default Rows per page using the Form Settings form.
|


 in the top right corner. See