Fixed Assets Import
Use the Fixed Assets Import feature to create fixed assets in bulk from Excel files. WorkBook validates the imported data, resolves fixed asset groups, generates journal entries, and commits the import in one transaction.
This topic covers the full import process, including file preparation, validation, journal entry review, and completion of the import.
Overview
The Fixed Assets Import feature in Deltek WorkBook allows you to bulk-import fixed assets from an Excel file. Instead of creating assets one by one, you can prepare a spreadsheet with all asset details, including depreciation parameters, financial values, and GL account assignments, and import them in a single operation.
The import follows a guided four-step wizard:
- Upload: Select your prepared Excel file or download a template.
- Validate: Review parsed asset data in a preview grid. Validation errors are highlighted per row.
- Review Journal Entries: Inspect the financial transactions (debits and credits) that will be generated.
- Import: Confirm and execute the import. All assets, groups, and journal entries are created atomically.
Prerequisites
Before you use Fixed Assets Import, make sure that the required setup is complete.
- Module setup complete: The Fixed Assets module must be fully configured before you can import. See Overview and Setup for the step-by-step configuration process (enable Company Variable 81, create GL accounts, configure suspense account, create journal type, validate finance settings).
- Access: You must have access to Finance in the company to access the import feature.
- GL Accounts: All GL accounts referenced in the import file must already exist in WorkBook and must not be blocked.
- File format: Your import file must be in .xlsx or .xls format.
- Asset tags: If you use asset tags, they must be unique across the company. Check for duplicates before importing.
How to Access Fixed Assets Import
- In the top navigation bar, click the Finance & Administration module icon.
- In the left sidebar, expand the Export, Import and Maintenance section.
- Click
Fixed Assets Import.
The Fixed Assets Import wizard opens.
Step 1: Upload File
When you open the import page, you see two options:
- Download Template: Downloads an Excel template with the correct column headers. Use this as a starting point for your import file.
- Upload File: Select your prepared .xlsx or .xls file.
Click Download Template to get a pre-formatted Excel file. The template includes:
- Row 1: Column headers (22 columns)
- Row 2: Helper text describing each column
- Click Select File to Import. A dialog opens where you can either drag and drop your file or click Select a file to browse.
- Select your file, then click OK to confirm.
- WorkBook parses the file and moves to Step 2.
Step 2: Validate Asset Data
After upload, WorkBook displays a preview grid showing all parsed assets. Each row represents one asset from your file.
- Red-highlighted rows: Assets with one or more validation errors. The Validation Errors column shows all errors for that row.
- If any rows have errors, WorkBook displays an Information dialog stating how many assets are valid and how many are invalid.
Use the Show only rows with errors checkbox to filter the grid and focus on problematic rows.
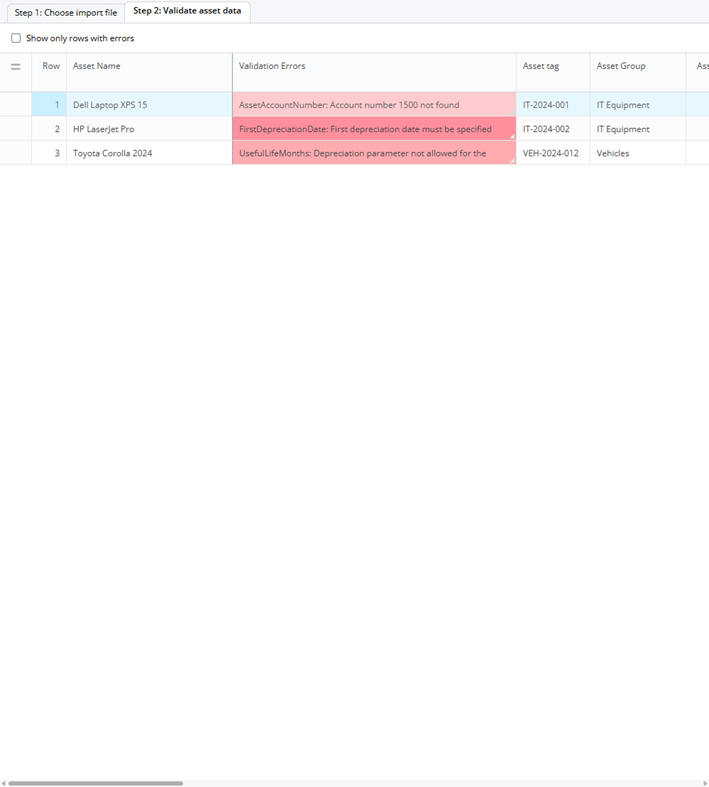
Step 2 - Validation grid showing assets with errors highlighted in red
When all rows pass validation, the grid shows clean rows with no error highlights:
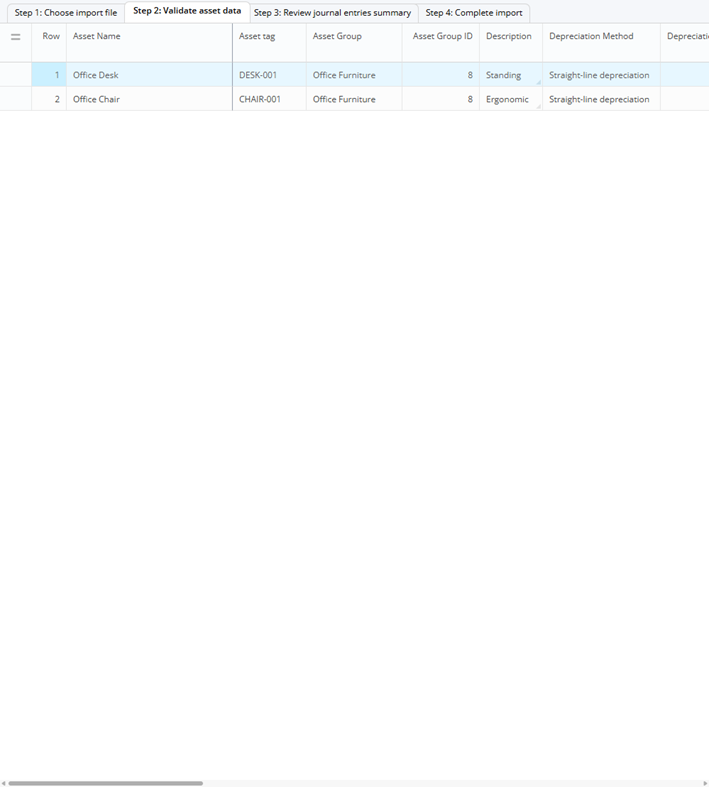
Step 2 - Validation grid with all assets passing validation
When errors are found, go back to your file, correct the errors, and re-upload.
Step 3: Review Journal Entries
| Column | Description |
|---|---|
| Account Number | The GL account number |
| Account Name | The GL account name |
| Debit | Total debit amount for this account |
| Credit | Total credit amount for this account |
Before using the Fixed Assets module, your organization may have been tracking asset costs and depreciation "by hand," recording them directly to general ledger accounts without structured fixed asset management. The import transfers those amounts from the old manual accounts into the proper fixed asset accounts, so that the general ledger stays balanced and no money appears to be created or lost.
The Existing Asset Account number is the GL account where the asset's cost was previously recorded. The Existing Accumulated Depreciation GL Account number is where depreciation was previously tracked. During import, WorkBook moves these amounts to the structured asset group accounts.
For each imported asset, WorkBook creates the following journal entries:
Capitalization entries (transfer of asset cost):
- Debit to the asset group's Asset Account: recognizes the asset in the fixed assets module
- Credit to the Existing Asset Account: removes the cost from the old manual account
- Debit to the Existing Accumulated Depreciation Account: removes the depreciation from the old manual account
- Credit to the asset group's Accumulated Depreciation Account: records the depreciation in the fixed assets module
The net effect is zero. No new value is created or destroyed. The amounts simply move from the old accounts to the new structured accounts.
Review the totals carefully. Click Next to proceed to the final step.
Step 4: Complete Import
The final step displays a confirmation message: "Ready to import to [Company Name]", showing the number of assets to be imported and a warning that this action cannot be undone.
Click Import N asset(s) to [Company Name] to execute the import, or Cancel to go back.
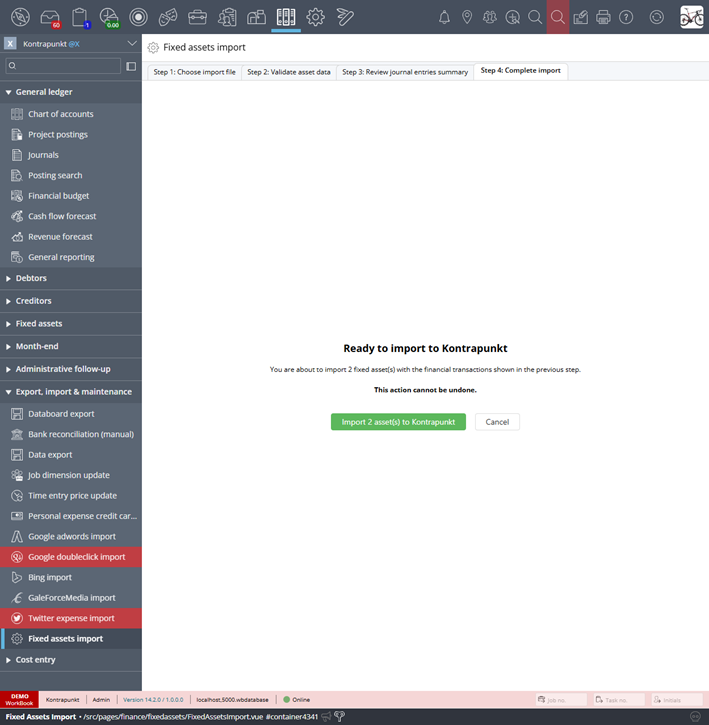
Step 4 - Import confirmation showing asset count and irreversibility warning
- All assets are created with their depreciation schedules.
- Asset groups are created (if new groups were specified).
- Journal entries are posted to the specified GL accounts.
- A success message confirms the number of assets imported.