Setting up invoice groups
An invoice group is a grouping of phases for a project so as to create multiple invoices for the project. You use invoice groups to invoice additional services separately, or to invoice multiple clients for a project.
You can add an invoice group for each invoice that you want to produce for the project.
To set up invoice groups
- With the project open, in the project tree on the left of the window, click the name of the project.
- Click the New Invoice Group button. An invoice group is added to the project tree.
- Define the invoice group by entering information for it on the right of the window in the Invoice subtab of the Project Info tab. If any of the information for the invoice group needs to be different from that of the project, you can change it.
Invoice examples:
| For | Do this | ||
|---|---|---|---|
|
Invoice group description |
You can name invoice groups to more easily identify invoices on the
Client Invoice List window. These invoice group names appear in the Invoice
Group column of the Client Invoice List window (if you select to display
that column by using To name the invoice group, type the name in this field. You can also highlight Invoice Group in the project tree, and type the new name there. |
||
|
Client |
Identify the client who is invoiced for services. To change the client,
click |
||
|
Invoice format |
To select an invoice format, click |
||
| Email Invoice Template | To select an email invoice template, click  . The options that appear depend on the email invoice templates you set up. . The options that appear depend on the email invoice templates you set up. |
||
|
Billing manager |
Identify the person responsible for billing. Enter it by clicking |
||
|
Identify the contact for the client that handles billing issues. To
enter it, click If the billing contact has an address on record, that address prints on the invoice. Otherwise, the client's address prints on the invoice.
|
|||
|
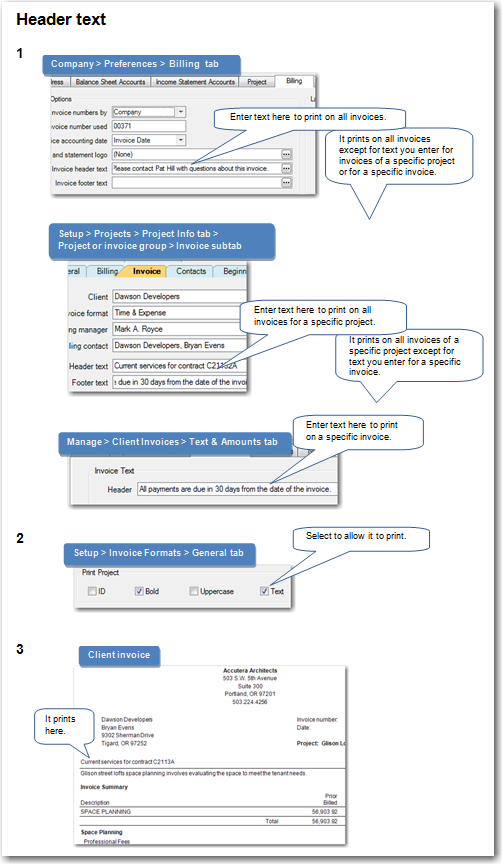
Enter text that you want to print on the invoice below the client mailing address. You can reenter header text from the Company Preferences window by right-clicking and clicking Refresh header text. If you entered header text on the Billing tab of the Company Preferences window, that text appears in this field and prints on client invoices for all projects, unless you change it here for this project. You can also change header text for a specific invoice on the Text & Amounts tab of the Client Invoice window. Either type the text or click
|
|||
|
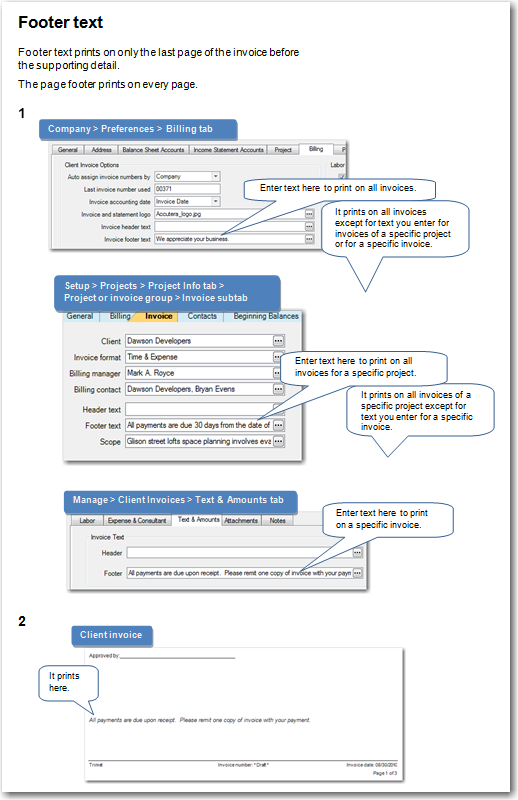
Enter text that prints on the last page only of the invoice above the page footer. You may choose to use it to print a holiday greeting or contract information. You can reenter footer text from the Company Preferences window by right-clicking and clicking Refresh footer text. If you entered footer text on the Billing tab of the Company Preferences window, that text appears in this field and prints on client invoices for all projects, unless you change it here for this project. You can also change footer text for a specific invoice on the Text & Amounts tab of the Client Invoice window. Either type the text or click
|
|||
|
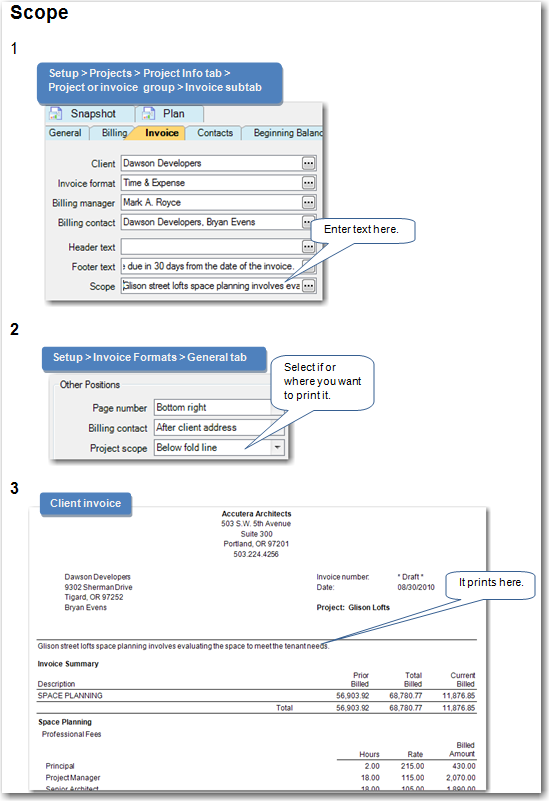
Enter the description of work to be performed for the project. Either type the text or click
|
 [Customize]).
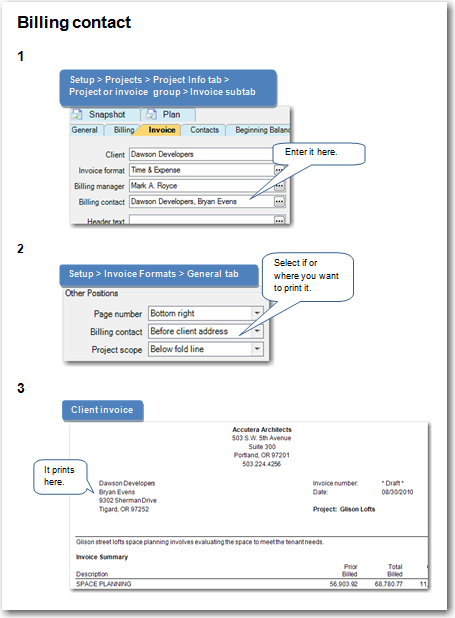
- Add, reorganize, copy, and delete phases and invoice groups until you have the project work breakdown structure exactly the way you want it.
- If Upload Attachments is turned on, check the Print backup attachments with invoice check box to have all backup attachments automatically selected to print with the invoice.
- If Upload Attachments is turned on, check the Include backup attachments when emailing invoices check box to include marked invoice backups in the PDF when emailing final invoices.
- Click Save.