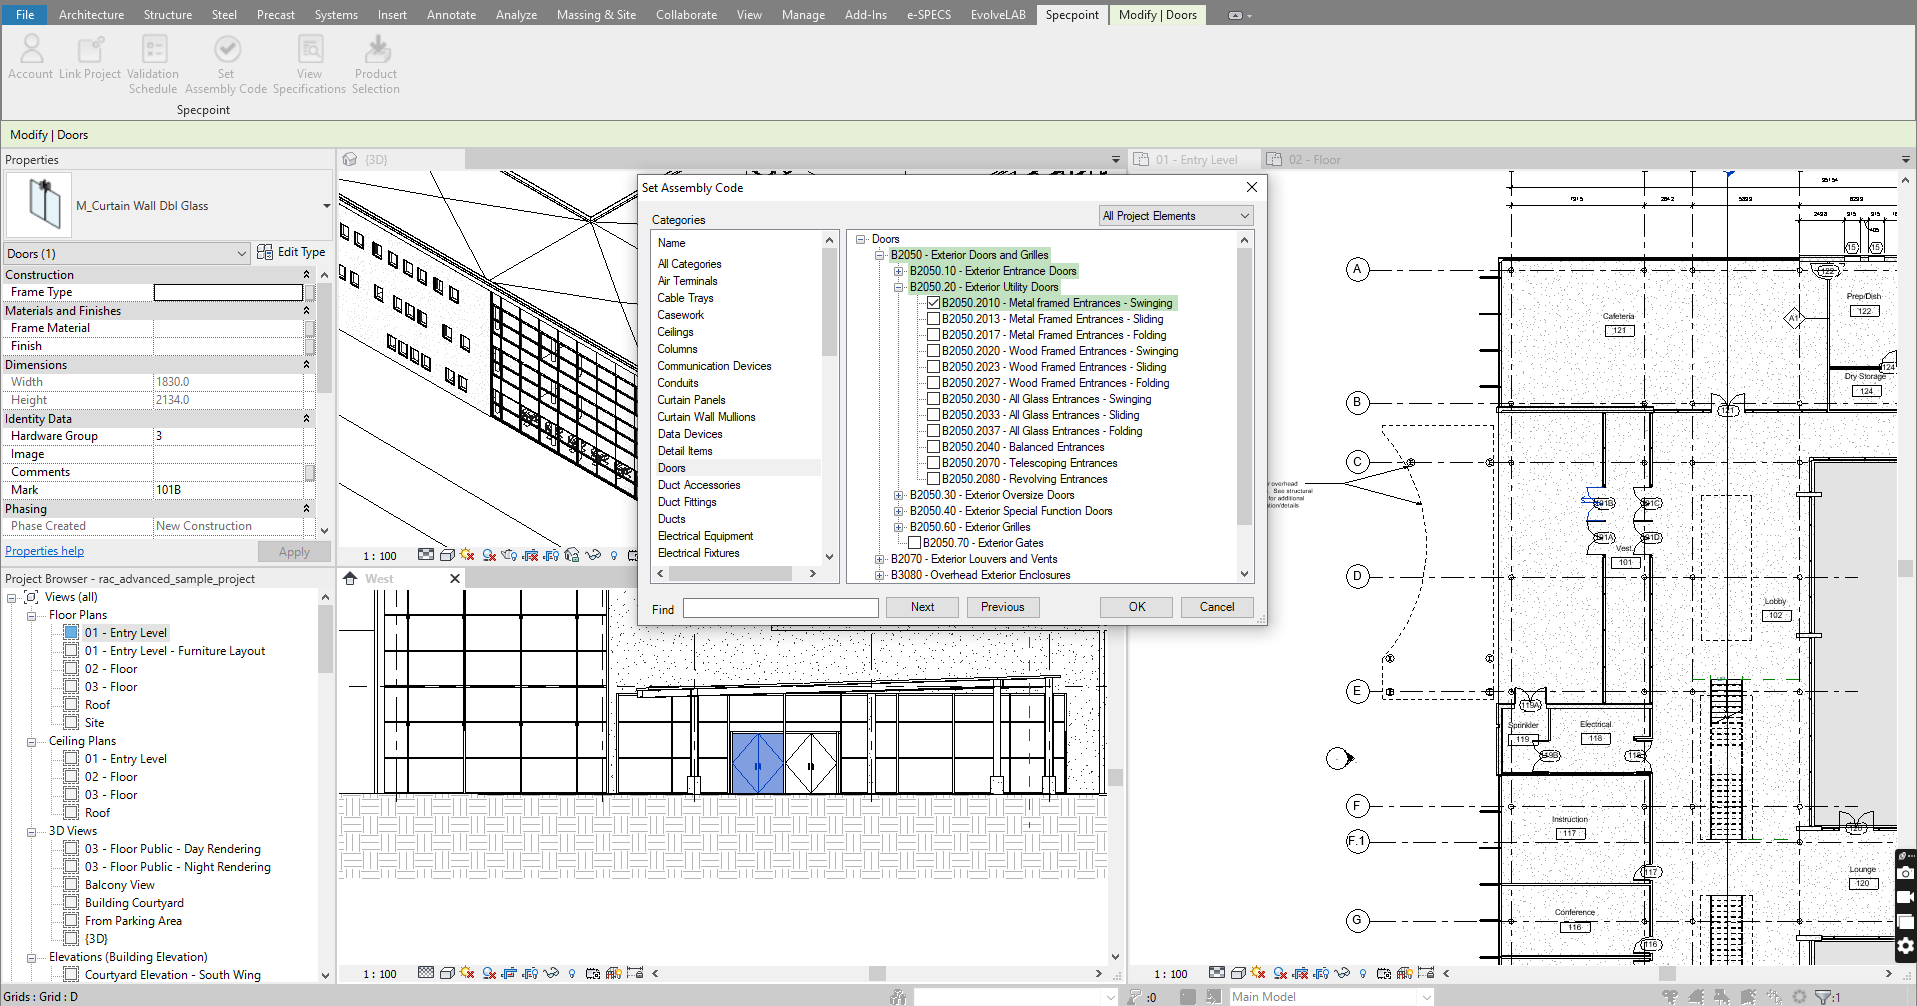
Set Assembly Code Dialog Box
Use this dialog box to create an association between a Specpoint assembly and your selected Revit model element.
The Set Assembly code contains options for selecting a category and an assembly. This dialog box automatically selects a category based on your selected Revit model element. For assemblies, the following views are available:
| View | Description |
|---|---|
| All Project Elements | This view displays all available Specpoint assemblies. This enables you to set an association between either an added or unadded assembly and your selected Revit model element. Use this view to create links to assemblies that you are currently working on in your linked Specpoint project as well as to assemblies that you intend to add. |
| Added to Project | This view displays only assemblies that you added to your Specpoint project. Use this view to link your selected Revit model element to an assembly that you are currently working on in your linked Specpoint project. |
In both views, the assemblies that you added to your Specpoint project display with a green highlight.

You can open the Set Assembly Code dialog box by the following methods:
- On the Specpoint tab of Specpoint plug-in for Revit, click Set Assembly Code. This requires that you selected an element in your Revit model, which has a linked project.
- In the Specpoint Model Validation dialog box, click the assembly code of a Revit model element.
- Related Topics:
- Contents of the Set Assembly Code Dialog Box
Use the contents of this dialog box to select a Specpoint assembly for which to set an association with your selected Revit model element.
Parent Topic: Specpoint Plug-in for Revit