![]()
The Schedule View option in the InTeract Client and Web Time Clock will allow an employee to view his or her schedule for a specified day.
When you click the Schedule View icon, you will need to select the post date for the schedule you want to view. After you click Save, the Schedule View form opens.
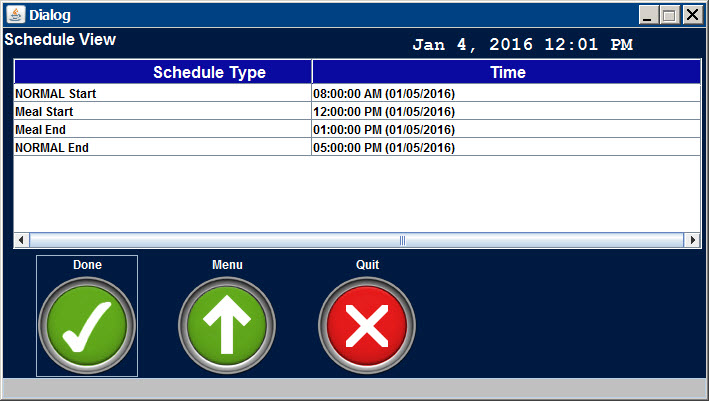
The Schedule View form will list the schedule’s start and end times, including meals, breaks, and optional schedule times.
You must add the Schedule View option to your terminal menu; see Add Schedule View to a Menu Tree for more information.
Schedule View is a "kiosk" event. You can require users to enter their passwords before accessing this event. See Password Required to Access Kiosk Events for more information. If you are viewing this event from a client terminal, you can also print it. See Print Kiosk Events from Client Terminals for more information.
Note: To view the schedules for each day in a specific pay week, use the Weekly Schedule View button in the client terminal.

See Also:
Add Schedule View to a Menu Tree
Modify the Schedule View Fields in a Form Profile
This feature requires the following:
You must have the Schedules module included in your license file.
The Schedules module must be enabled.
To check if the module is included in your license and enabled:
Click Main Menu > Configuration > System > Licensing.
On the License Modules tab, select the Module Name called Schedules.
The following boxes must be checked: Licensed and Module Enabled.
The Schedule View menu item is available in the menu tree of the DEFAULT terminal group. It displays the Schedule View menu button on a terminal or the Web Time Clock. If the Schedule View menu item has been removed, however, you must add it to the Menu Tree of the applicable Terminal Profile. To do so, use the following steps:
Click Main Menu > Configuration > Form Configuration > Menu Tree.
Select the Menu Group Name for the Terminal Menu to which you want to add the Schedule View.
Click Add Event.
Select the Schedule View (SCHEDULE_VIEW) event.
Click Save.
The Schedule View form has two columns: Schedule Type and Time. You can show, hide, or reorder these columns on the Form Profile form (Main Menu > Configuration > Form Configuration > Form Profile).
Click Main Menu > Configuration > Form Configuration > Form Profile.
Select the Form Profile Name you want to modify.
Click the  button next to the Terminal
Forms item to display the
available forms and click Schedule
View.
In the Resultset Fields section, the items in the Selected box will appear on the terminal. The items in the Available box will not appear on the terminal. Use the buttons between these boxes to move the fields from Available to Selected and to reorder the fields.
Click Save.