![]()
The Request View option in the InTeract Client and Web Time Clock will show an employee the status of his or her time off requests.
You may need to add the Request View option to your terminal menu; see Add Request View to a Menu Tree for more information.
Request View is a "kiosk" event. You can require users to enter their passwords before accessing this event; see Password Required to Access Kiosk Events for more information. If this event will be viewed from a client terminal, you can give employees the option to print the screen; see Print Kiosk Events from Client Terminals for more information.
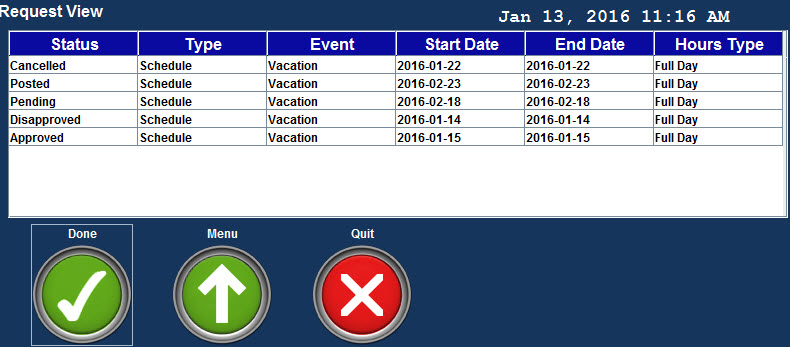
The Request View form shows the following information. These fields are also in the Time Off Request form in the Shop Floor Time Web. You can show or hide these fields by modifying your Form Profile.
The Request View form will only show time off requests with an End Date greater than the current date. Expired requests will not be shown.
Status: Indicates whether the time off request is Pending, Approved, Disapproved, Cancelled, or Posted.
Type: When an employee or supervisor creates a time off request, the Type will be SCHEDULE. When an employee requests to cancel an approved time off request or modifies an approved time off request, the Type will be CANCEL.
Event: Event that will be posted for the time off hours.
Start, End Date: Indicates the year, month, and day when the requested time off starts and ends.
Hours Type: Indicates whether the time off request is for a Full Day, Half Day, or Hours Amount. Full Day and Half Day hours are based on the person's schedule. Hours Amount will also include the number of hours.
See Also:
Add Request View to a Menu Tree
Modify the Request View Fields in a Form Profile
Requesting and Approving Time Off
This feature requires the following:
You must have the Request PTO module included in your license file.
The Request PTO module must be enabled.
To check if the module is included in your license and enabled:
Click Main Menu > Configuration > System > Licensing.
On the License Modules tab, select the Module Name called Request PTO.
The following boxes must be checked: Licensed and Module Enabled.
The Request View menu item is available in the TERMINAL_DEFAULT Menu Tree. It displays the Request View button on a terminal or the Web Time Clock. If Request View item been removed, however, you must add it to the Menu Tree of the applicable Terminal Profile. To do so, use the following steps:
Click Main Menu > Configuration > Form Configuration > Menu Tree.
Select the Menu Group Name for the Terminal Menu to which you want to add Request View.
Click Add Event.
Select the Request View (PTO_REQUEST_VIEW_READONLY) event.
Click Save.
You can show, hide, or reorder the columns on the Request View form. To do so, use the Form Profile form.
Click Main Menu > Configuration > Form Configuration > Form Profile.
Select the Form Profile Name you want to modify.
Click the ![]() button next to the Terminal
Forms item to display the
available forms and click Request
View.
button next to the Terminal
Forms item to display the
available forms and click Request
View.
In the Resultset Fields section, the items in the Selected box will appear on the terminal. The items in the Available box will not appear on the terminal. Use the buttons between these boxes to move the fields from Available to Selected and to reorder the fields.
Click Save.