OT Offer
The OT Offer form allows you to create an overtime
offer and select a group of employees to work overtime. Once you define
the employees, day of the overtime hours, and number of overtime hours,
you can present the offer verbally or electronically.
Employees can accept or refuse the offer using the OT
Response form. A supervisor can also accept or refuse an offer on
behalf of the employee using the OT Offer
Detail tab.
Detail Form:
OT Offer Detail
See Also:
OT Offer
Field Descriptions
Find an OT Offer
Add an OT Offer
Modify an OT Offer
Copy an OT Offer
Offer Comments
Add Person(s)
Add Pool(s)
Cancel an OT Offer
OT
Offer Field Descriptions
OT Offer Policy Name
This identifies the OT Offer
Policy that is assigned to the person who is currently logged in.
Offer Status
This identifies the current status of the overtime offer.
The following statuses are available:
Cancelled: The overtime offer has
been cancelled.
Offered:
The overtime has been offered to one or more employees.
Pending:
The overtime has not yet been offered to any employees.
Overtime Type
This indicates when the overtime will occur. Options are
Before After (before or after
schedule), Gap, and Holiday.
The Gap option
will only be available if the person's OT
Offer Policy has Gap Overtime
selected.
Required
This indicates whether the overtime is Mandatory
or Optional.
If the overtime is Mandatory,
when the offer is authorized, an overtime schedule will be created with
the Schedule Type Normal. A Normal
schedule is one that the employee must follow; there will be a violation
if time is not posted.
If the overtime is Optional,
when the offer is authorized, an overtime schedule will be created with
the Schedule Type Optional. An Optional
schedule is one for which the employee will not receive a violation
if time is not posted.
You can view these overtime schedules on the Person
Schedule form.
Start Post Date, End Post Date
These are the start and end dates for the overtime.
Before Hours
When the Overtime Type
is Before After, this value is
the amount of overtime hours you want the employee to work before their
schedule. The value is in decimal hours or HH:MM. The default value is
0. Before Hours is not available if the Overtime
Type is Gap or
Holiday.
After Hours
When the Overtime Type
is Before After, this value is
the amount of overtime hours you want the employee to work after their
schedule. The value is in decimal hours or HH:MM. The default value is
0. After Hours is not available if the
Overtime Type is Gap or Holiday.
Total Hours
If the Overtime Type
is Gap or Holiday,
this field is the total number of overtime hours that the employee will
work.
When the Overtime Type
is Before After, the Total
Hours is the sum of the Before
Hours and After Hours.
Cutoff Date
This is the date and time when the overtime offer expires.
This field defaults to the day after the offer was created.
Employees may still accept/refuse an expired offer; the
offer’s status will change to Accepted After Cutoff or Refused After Cutoff.
If an offer has a status of Offered or Acknowledged and
has expired per the Cutoff Date, the EXPIRE_OFFERS service will update
the offer status to Refused After Cutoff.
Note that offers with a status of Refused After Cutoff
can still be accepted. The status will change to Accepted After Cutoff.
Req. Emp. Amount
This is the requested employees amount which is the number
of employees that will be requested to work this overtime offer.
Comments
This field displays any comments that were added to the
overtime offer. The employee can read these comments when they view the
overtime offer on the OT Response form.
Date Created, Created By
This identifies when the overtime offer was created and
the person who created the overtime offer.
Update Date, Updated By
These fields display when the record was created or updated,
and the person who created or updated the record.
Find
an OT Offer
Click Main
Menu > Manage > OT Offer.
Click the  Filter button to display the
filter fields.
Filter button to display the
filter fields.
You can use the following filter
fields to narrow your search: Shift,
Schedule Cycle,
Pay Scale
Name, Pay
Class, Pay
Level, Show
Expired, Facility,
Supervision Type,
and Include Direct.
Click Find.
The overtime offers matching your filter settings
will appear on the OT Offer form.
Add
an OT Offer
Click Main
Menu > Manage > OT Offer.
Click Add.
The OT Offer Policy
Name field displays the name of the OT Offer Policy assigned
to the person who is currently logged in.
In the Req.
Persons Amount field, enter the number of people that will
be requested to work the overtime offer.
Select an Overtime
Type (Before After,
Holiday, or Gap).
From the Required
field, select Mandatory or
Optional.
Select the Start
Post Date and End Post Date
for the overtime.
If you selected Before
After as the Overtime Type,
enter the Before Hours
and/or After Hours
for the offer.
If you selected Gap
or Holiday as the Overtime
Type, enter the Total
Hours for the offer.
Select a Cutoff
Date for the overtime offer.
Enter a comment in the Comment box (optional).
If you want to add more than
one overtime offer, click Save and
Add to save the current offer and keep the Add OT Offer pop-up
form open. Click Save to save
the current offer and return to the main form.
Modify
an OT Offer
Note: When an offer
is modified and saved, a new offer is created. The previous version gets
a status of Cancelled. Exception: A new offer will not be created if only
the Req. Persons Amount field
is modified.
Click Main
Menu > Manage > OT Offer.
Find the record you want to
change and click Modify (or
double-click the record).
Modify the record and click
Save.
Copy an OT Offer
Click Main
Menu > Manage > OT Offer.
Select the record you want to
duplicate and click Copy.
Modify fields as necessary.
If you want to add another overtime
offer, click Save and Add
to save the current offer and keep the Copy OT Offer pop-up form open.
Click Save to save the current
offer and return to the main form.
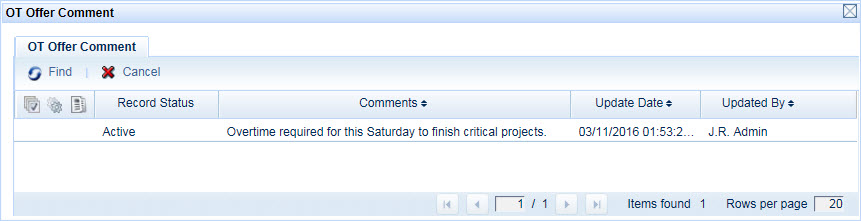
Offer Comments
To view comments that you made when you created the overtime
offer, select the offer on the main form and click the Offer
Comments button. The OT Offer Comment form will open.
When you are done, click the  button
to close the form.
button
to close the form.
Add Person(s)
The Add Person(s)
button is used to select the persons who will receive the overtime offer.
You can select from a list of persons you supervise. Only persons you
supervise who are not yet associated with the offer or who had the offer
Revoked will appear on this form.
Note: To select
from a list of persons for which you are an OVERTIME_POOL Manager, use
the Add Pool(s)
button.
To use the Add Person(s) button:
Click Main
Menu > Manage > OT Offer.
Select an overtime offer and
click Add Person(s).
The OT Add Person pop-up form appears.
Note: Only
persons who are not yet associated with the offer or who had the offer
Revoked will appear on this form.
To find specific persons, click
the Filter
button to display the filter fields. Select your search criteria and
click Find. The OT Add Person
form will update with the appropriate persons.
The Over Day
Threshold field displays a
red X when the supervisor has exceeded the Max. Hrs.
Per Day in their OT Offer Policy. This threshold is exceeded when
the sum of not-cancelled overtime response records for any date in
the offer range, plus the current offer's hours per day, is larger
than the Max. Hrs. Per Day in the supervisor's
OT Offer Policy.
The Over Week
Threshold field displays a
red X when the supervisor has exceeded the Max. Hrs.
Per Week in their OT Offer Policy. This threshold is exceeded when
the sum of not-cancelled overtime response records in the week, plus
any hours from the current offer that also fall in that week, is larger
than the Max. Hrs. Per Week in the supervisor's
OT Offer Policy.
Select the persons who will
receive the overtime offer. To select multiple employees, press the
CTRL key as you click them. You can select up to 50 employees at a
time (the maximum number of records that can display on the form on
one page).
Click Save.
The persons you added will appear on the OT
Offer Detail tab at the bottom of the OT Offer form.
You will use the OT Offer Detail form to offer the
overtime to the person and authorize the overtime once the person
accepts the offer.
Add Pool(s)
The Add Pool(s)
button is used to select persons other than those you supervise to receive
the overtime offer. You can select from a list of persons for which you
are an OVERTIME_POOL Manager.
Only persons in your OVERTIME_POOL group who are not yet
associated with the offer, including persons who had the offer Revoked,
will appear on this form.
Note: To select
from a list of persons you supervise, use the Add Person(s) button.
To use the Add Pool(s) button:
Click Main
Menu > Manage > OT Offer.
Select an overtime offer and
click Add Pool(s).
The OT Pool pop-up form appears.
If necessary, click the Filter
button to display the filter fields.
From the OT
Pool field, select the OVERTIME_POOL groups with the employees
you want to offer overtime. Press the CTRL key and click to select
multiple OVERTIME_POOL groups. Only the OVERTIME_POOL groups for which
you are a manager will be available.
You can also use the Person
Num, Shift, Schedule
Cycle, and Facility
fields to narrow your selection.
Note: Only
persons who are not yet associated with the offer, including persons
who had the offer Revoked, will appear on this form.
Click Find.
The OT Pool form will display the appropriate persons
in the middle of the form. The OT
Pool field lists all the OVERTIME_POOL groups to which the
employee belongs.
The Over Day Threshold field
displays a red X when the supervisor has exceeded the Max. Hrs. Per
Day on their OT Offer Policy. This threshold is exceeded when the
sum of not-cancelled overtime response records for any date in the
offer range, plus the current offer's hours per day, is larger than
the Max. Hrs. Per Day in the supervisor's OT Offer Policy.
The Over Week Threshold field
displays a red X when the supervisor has exceeded the Max. Hrs. Per
Week in their OT Offer Policy. This threshold is exceeded when the
sum of not-cancelled overtime response records in the week, plus any
hours from the current offer that also fall in that week, is larger
than the Max. Hrs. Per Week in the supervisor's OT Offer Policy.
Select the persons who will
receive the overtime offer. To select multiple employees, press the
CTRL key as you click them. You can select up to 50 employees at a
time (the maximum number of records that can display on the form on
one page).
Click Save.
The persons you added will appear on the OT
Offer Detail tab at the bottom of the OT Offer form.
You will use the OT Offer Detail form to offer the
overtime to the person and authorize the overtime once the person
accepts the offer.
Cancel an Overtime Offer
The Cancel button
is used to cancel a Pending or Offered overtime offer. When an offer is
cancelled, it can no longer be accepted, refused, acknowledged, or authorized.
Click Main
Menu > Manage > OT Offer.
Select the offer and click Cancel.
The OT Cancel Offer pop-up form appears.
Enter an (optional) comment
in the Comment box.
Click Cancel
Offer.
The Offer Status will change to Cancelled.