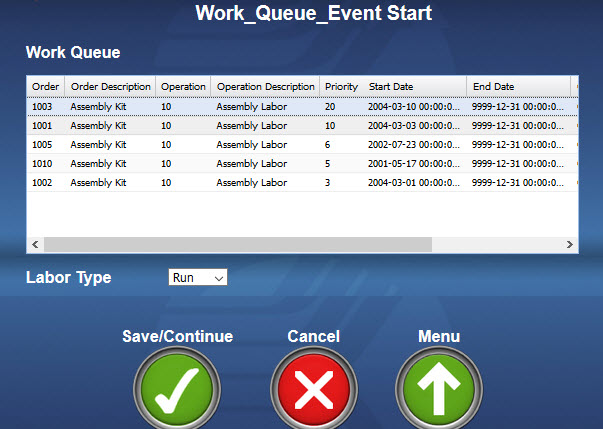
The Work Queue feature presents a user with a list of jobs when the user posts a labor event. The user will not have to enter or scan an order number, operation number, project number, task number, or other charge element values. Instead, the available jobs will be presented in a grid that can be sorted in priority order. The user only needs to select an item from the grid.
The work queue grid will come from a custom event prompt. The jobs that appear in the grid will come from a Valid Values query. This query will specify the columns to include, which records to filter, and how to sort the records. It will also populate the grid automatically.
You will need to create the work queue event prompt, create the Valid Values query, assign the Valid Values query to the work queue event prompt. You will also need to configure a prompt validation and a prompt setting for the event with the work queue grid. These configuration steps are explained below.
The work queue grid is designed for display on a web timecard or the Web Time Clock. If you are using the Mobile application, InTeract client, or InTouch terminal, the work queue jobs will be presented in a combo box.
Create a Valid Values Query for the Work Queue Jobs
Configure the Work Queue Event Prompt
Hide Charge Element Prompts on Add
Add the Prompt Validation to the Event
Configure the Prompt Setting "Show Start Prompt on Stop"
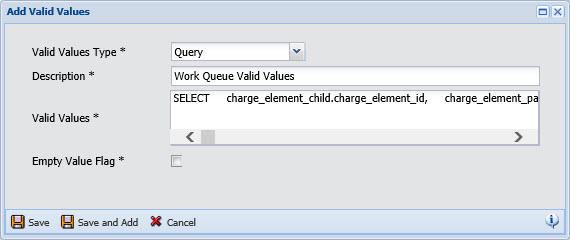
The jobs that appear in the work queue grid will come from a Valid Values query. To define this query, use the Valid Values form (Main Menu > Configuration > Event > Valid Values).
Click Add on the Valid Values form. For the Valid Values Type, select Query. Enter the query in the Valid Values field.
The query should be configured as outlined below:
The columns that appear in the work queue grid will come from the select portion of the query.
The first column in the select portion will be the key to identify the record and will not be visible in the grid. The remaining columns in the select portion of the query will be displayed in the grid in the same order that they are listed in the query.
You can also group charge elements using Charge Filtration Groups or specific columns in any of the charge element tables. For example, you can include a Charge Filtration Group in the select portion of the query to select only those charge elements that belong to the Charge Filtration Group.
The column headers will come from the Dictionary that is in effect. If there is no entry for the column in the Dictionary, the name of the column in the query will be used.
The records in the work queue grid will be filtered according to the where portion of the query.
The records in the work queue grid will be sorted according to the order by portion of the query.
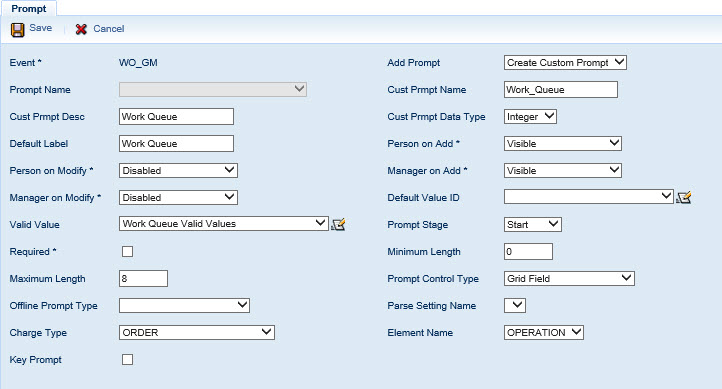
In the event that will be used to post the labor, you will need to add a custom event prompt for the work queue grid. To do so, use the Prompt tab in the Events form (Main Menu > Configuration > Events > Event).
Click Add in the Prompt tab. In the Add Prompt field, select Create Custom Prompt.
Person/Manager on Add should be set to Visible. Person/Manager on Modify should be set to Disabled.
In the Valid Value field, select the Valid Values query you defined earlier.
Set the Prompt Control Type to Grid Field.
Set the Charge Type and Element Name fields to the lowest level charge element the user will be selecting. For example, if the event is posting an Order and Operation, set Charge Type to Order and set Element Name to Operation.
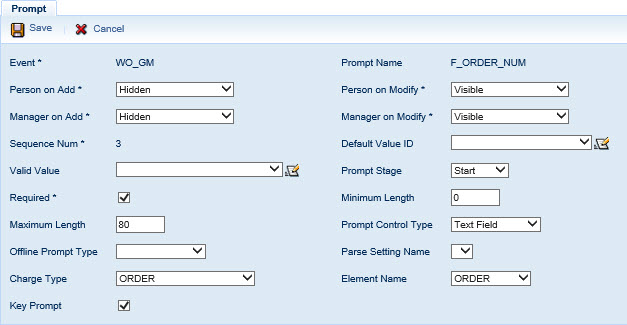
The prompts for the charge elements (Order, Operation, Project, etc.) can be hidden. These prompts will not be needed when posting the labor because the work queue grid will contain this data. You will need to make these prompts visible on modify, however. When the event is being modified, the work queue grid will be disabled, so the user will need the charge element prompts to make changes to them.
Set Person/Manager on Add to Hidden and set Person/Manager on Modify to Visible.
You will need to add a prompt validation to the event that has the work queue grid. The validation is called Parent Charge Element Population. It needs to be the first Prompt Validation in the list of validations. The Parent Charge Element Population validation will populate the charge element prompts that you had hidden earlier. These prompts will be populated based on what is selected from the work queue grid.
For example, a work order event has a work queue prompt where the user can select from a list of order and operation numbers. This work queue prompt will be visible when the user posts the event, but the Order and Operation prompts will be hidden. The Parent Charge Element Population validation will populate the Order and Operation prompt values based on what the user selected in the work queue grid. When the labor is stopped or the event is modified, the correct values will display in the Order and Operation prompt fields.
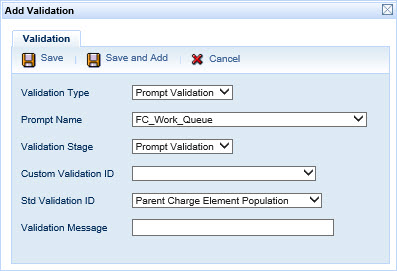
To add this validation to the event, use the Validation tab on the Events form. Click Add and select Prompt Validation as the Validation Type and Validation Stage. In the Prompt Name field, select the work queue event prompt you configured earlier. From the Std Validation ID field, select Parent Charge Element Population. After you save this record, use the Move Up and Move Down buttons to position this validation so it is the first Prompt Validation in the list.
You will need to configure the work queue event prompts with the Show Start Prompt On Stop Prompt Setting.
This setting determines whether an event prompt will appear when stopping a labor. The Show Start Prompt On Stop prompt setting should be used to hide the work queue grid prompt when the labor stops, and show the prompts that were hidden during labor start.
The Show Start Prompt On Stop prompt setting works with the Event Setting called DONT_SHOW_START_PROMPT. When DONT_SHOW_START_PROMPT is False (the default setting), the event's start prompts will display as read-only when the labor stops. The Show Start Prompt On Stop prompt setting is used to hide individual event prompts when the labor stops.
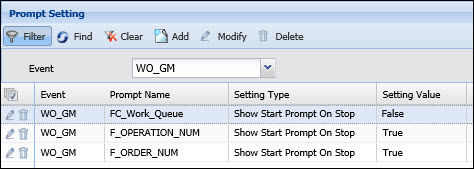
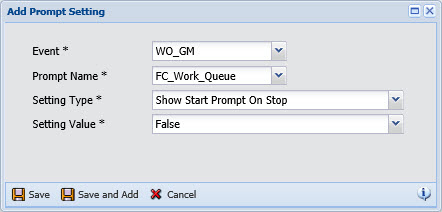
Go to the Prompt Setting form (Main Menu > Configuration > Event > Prompt Setting) and click Add. In the Event field, select the event with the work queue grid. In the Prompt Name field, select the work queue event prompt. For the Setting Type, select Show Start Prompt On Stop and change the Setting Type to False.
Repeat the above steps for the prompts that were hidden on add, but change the Setting Value to True.