The Balances configuration on the Attendance Policy form applies only when an employee attempts to post an elapsed transaction via the web timecard or a client terminal using events that have leave type (balance) codes connected to them. The Balances configuration determines the following:
If the elapsed transaction may draw from balances. See Balances Enabled in the Field Descriptions below.
If the system should perform a balance query to confirm if the employee has enough balances to cover the elapsed event. See Balance Check in the Field Descriptions below.
If the employee is allowed to post to the elapsed event when balances are insufficient. See Balance Check in the Field Descriptions below.
Which event should post when balances connected to the elapsed event have been exhausted. See Insufficient Balance in the Field Descriptions below.
By default, balances are not enabled, which means that the system will not draw from balances when the user posts an event on the Web timecard or a client terminal.
Note that the Balances configuration in the Attendance Policy does not apply to events posted via the ATTENDANCE service or when events are posted via an approved Time Off Request. Balances are always updated when a Time Off request is approved or the ATTENDANCE service runs.
Events that can use Leave Type (Balance) Codes are events with the Event Type IDs listed below:
Event Type ID |
Event Name Note: These are the default event names. |
ATTENDANCE:HOLIDAY |
HOLIDAY |
ATTENDANCE:SICK |
SICK |
ATTENDANCE:TIME_OFF |
TIME_OFF |
ATTENDANCE:VACATION |
VACATION |
You can view events and configure the leave type codes they use by selecting the event in the Events form and clicking the Balance Code tab. To configure an employee's balances, see Leave Tab.
See Also:
Configure the Balances Settings
Balances Enabled
When the Balances Enabled box is checked and the time reporter posts a time off event (such as Sick, Vacation, or FMLA) on the Web timecard or a client terminal, the event will draw from the leave type codes that are attached to the event. You can view events and configure the leave type codes they use by selecting the event in the Events form and clicking the Leave Type tab.
When Balances Enabled is not checked, the system does not draw from balances. By default balances are not enabled.
Note that employee balances always update when a Time Off request is approved or the ATTENDANCE service runs.
When Balances Enabled is checked, you need to select a Balance Check option. You can also select an Insufficient Balance event.
Balance Check
When Balances Enabled is checked, the Balance Check option determines what will happen when the available balances are not sufficient to cover the event.
Ignore: Select Ignore to post the event without displaying any notification or warning to the user regarding the insufficient balance.
Forbid: Select this option if you do not want the event to post when there is an insufficient balance. The employee will receive a warning message and the event will not post.
Confirm: Select Confirm to notify the user that there is insufficient balance and allow the user to decide whether to post the event or not.
If the balance is not enough to cover the hours, an Insufficient Balance dialog will display. The user may choose to Cancel or Continue. If the user chooses to continue, the event will post.
Note: The Insufficient Balance dialog will not display when posting/modifying hours directly on the timecard (direct entry posting). Instead, the system will prompt the user to use the Add Elapsed button to post the event. If the balance is not enough to cover the hours, the Insufficient Balance dialog will display.
If the Balance Policy is configured for overdraw warnings (Overdraw in the Balance Policy is set to Forbid or Confirm), the employee may receive an overdraw warning. The overdraw warning indicates that posting the event will lead to a negative balance.
For example, an employee’s Attendance Policy has Balance Check set to Confirm. The Balance Policy for the vacation leave type code has Overdraw set to Confirm and has an Overdraw Amount of 8 hours.
An employee has only 1 hour left in his vacation balance. The employee tries to post 10 hours of vacation. Although the Overdraw Amount (8) increases the available balance from 1 to 9, the balance is still insufficient to cover the event. Therefore the employee will get an insufficient balance warning.
If the employee tries to post 8 hours of vacation, the balance (9) is sufficient to cover the event, so there will be no insufficient balance warning. However, this event posting will cause the balance to become negative, so the employee will receive an overdraw warning. If the employee chooses to continue posting the event, his vacation balance will go to -7.
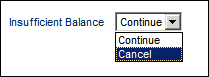
Insufficient Balance
Note: This field applies only if the Balance Check value is Ignore or Confirm.
Insufficient Balance is the event to which hours will post when the balances are exhausted and the time reporter is allowed to post the hours.
The available events are those with Event Type ATTENDANCE: TIME_OFF. You can configure these events in the Events form.
If Insufficient Balance is blank, the hours will post to the original event but with no leave type code on the timecard.
If you select an Insufficient Balance event, the hours will post to this event and a leave type code will list on the timecard.
Click Main Menu > Configuration > Policies > Attendance Policy.
In the Policy Name field, select the record you want to view and click Find.
Click the Balances tab to view the current configuration.
Click Main Menu > Configuration > Policies > Attendance Policy.
If you already have an Attendance Policy that you want to enable/modify Balances in, select the Attendance Policy, then click Modify. If you do not have an Attendance Policy, see Add an Attendance Policy.
Click the Balances tab.
If you want time off events (such as Sick, Vacation, or FMLA) that are posted on the Web timecard or a client terminal to draw from the leave type codes that are attached to the event, check the Balances Enabled box.
When Balances Enabled is checked, the Balance Check option determines what will happen when the available balances are not sufficient to cover the event.
Select Ignore to post the event without displaying any notification or warning to the user regarding the insufficient balance.
Select Forbid if you do not want the event to post when there is an insufficient balance. The employee will receive a warning message and the event will not post.
Select Confirm to notify the user that there is insufficient balance and allow the user to decide whether to post the event or not.
If the Balance Check value is Ignore or Confirm, you can specify an Insufficient Balance event to which hours will post when the balances are exhausted and the time reporter is allowed to post the hours.
Click Save.
Click Main Menu > Configuration > Policies > Attendance Policy.
In the Policy Name field, select the record you want to view and click Modify.
Navigate to the Balances tab.
Make the necessary modifications and click Save.