When you add or modify an event message trigger (using the Message Trigger tab on the Events form), you can use the Message Trigger pop-up form to find, add, modify, copy, or delete an event message trigger.
To open this form, go to the Message Trigger
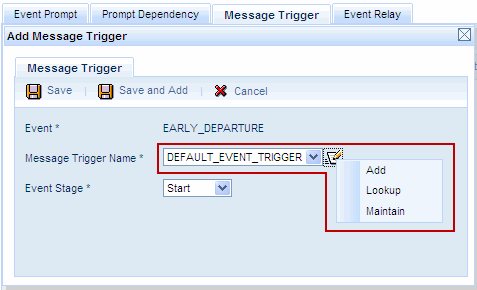
tab on the Events form and click Add or Modify. On the pop-up form, click
the ![]() button next to the Message
Trigger Name field and select Add, Lookup, or Maintain from the pop-up
menu.
button next to the Message
Trigger Name field and select Add, Lookup, or Maintain from the pop-up
menu.
See Also:
Message Trigger pop-up form – Field Descriptions
Message Trigger Name
Name of the custom message trigger you are defining for the event.
Description
Description of the custom event message trigger.
Message Trigger Type
This field is set to EVENT and cannot be modified.
Message Label
Label used to identify the message in the Dictionary.
Message
Text of the message that is sent to a user based on this trigger.
When editing these messages, do not modify the text that appears in percentage signs or brackets (e.g., [%EVENT_NAME%]). The application will change this text automatically based on the reason for the message.
Click Main Menu > Configuration > Event > Events.
Select the Event and click the Message Trigger tab.
Click Add to add a new event message trigger or click Modify to change an existing message trigger.
On the Add Message Trigger or Modify
Message Trigger form, click the ![]() button next to the Message Trigger Name field and select Lookup
from the pop-up menu.
button next to the Message Trigger Name field and select Lookup
from the pop-up menu.
Select the custom event message trigger name and click OK.
Click Main Menu > Configuration > Event > Events.
Select the Event and click the Message Trigger tab.
Click Add to add a new event message trigger or click Modify to change an existing message trigger.
On the Add Message Trigger or Modify
Message Trigger form, click the ![]() button next to the Message Trigger Name field and select Add
from the pop-up menu.
button next to the Message Trigger Name field and select Add
from the pop-up menu.
Enter the Message Trigger Name and Description.
The Message Trigger Type is set to EVENT.
Enter the Message Label used to identify the message in the Dictionary.
Edit the Message that is sent to a user based on this trigger. When editing these messages, do not modify the text that appears in percentage signs or brackets (e.g., [%EVENT_NAME%]). The application will change this text automatically based on the reason for the message.
If you want to add more than one record, click Save and Add to save your settings and keep the window open. Or click Save to save your record and return to the main form.
Click Main Menu > Configuration > Event > Events.
Select the Event and click the Message Trigger tab.
Click Add to add a new event message trigger or click Modify to change an existing message trigger.
On the Add Message Trigger or Modify
Message Trigger form, click the ![]() button next to the Message Trigger Name field and select Maintain
from the pop-up menu.
button next to the Message Trigger Name field and select Maintain
from the pop-up menu.
Select the Message Trigger Name you want to change and click Modify.
Modify the Description, Message Label, and Message as necessary.
Click Save.
Click Main Menu > Configuration > Event > Events.
Select the Event and click the Message Trigger tab.
Click Add to add a new event message trigger or click Modify to change an existing message trigger.
On the Add Message Trigger or Modify
Message Trigger form, click the ![]() button next to the Message Trigger Name field and select Maintain
from the pop-up menu.
button next to the Message Trigger Name field and select Maintain
from the pop-up menu.
Select the Message Trigger Name you want to duplicate and click Copy.
You can modify all the fields except the Message Trigger Type.
If you want to make additional copies of the Message Trigger Name, click Save and Add to save your settings and keep the form open. Or click Save to save your Message Trigger Name and return to the main form.
Click Main Menu > Configuration > Event > Events.
Select the Event and click the Message Trigger tab.
Click Add to add a new event message trigger or click Modify to change an existing message trigger.
On the Add Message Trigger or Modify
Message Trigger form, click the ![]() button next to the Message Trigger Name field and select Maintain
from the pop-up menu.
button next to the Message Trigger Name field and select Maintain
from the pop-up menu.
Select the Message Trigger Name you want to remove and click Delete.
Click OK to confirm the action.