To add or modify a Message
Policy, you must first create a Message Policy Name. To do so, click
the ![]() button next to the Message
Policy Name field on the Message Policy form. Select Add, Lookup, or Maintain
from the pop-up menu.
button next to the Message
Policy Name field on the Message Policy form. Select Add, Lookup, or Maintain
from the pop-up menu.
See Also:
Message Policy pop-up form - Field Descriptions
Message Policy Name
Name of the Message Policy.
Description
Description of the Message Policy.
Use Priority
Controls the order in which employees receive messages.
If you check this box, messages will be displayed first according to their Priority (High, Medium, and Low) and second by the date they were sent (date the trigger occurred and the message was sent). Priority is a message trigger setting (see Trigger Setting).
If you do not check this box, messages will be displayed in the order of the date they were sent, with the oldest being displayed first.
Ask for Message
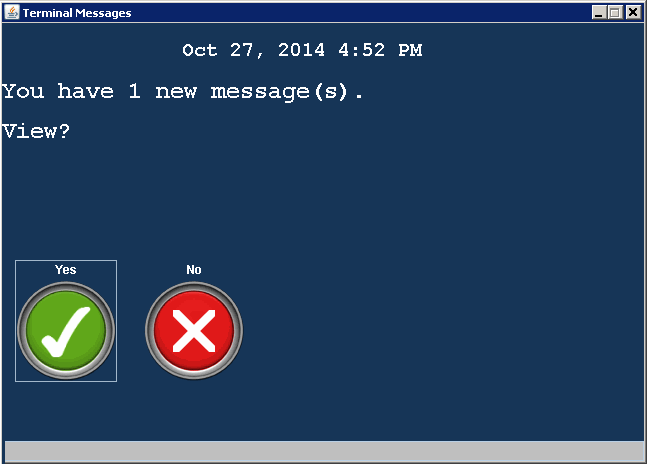
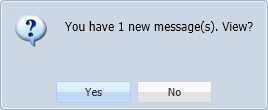
If you want to give users the option to read messages or not, check this box. When users logs into a client terminal or the web application, the user will be asked whether to view the messages.
On the Client Terminal:

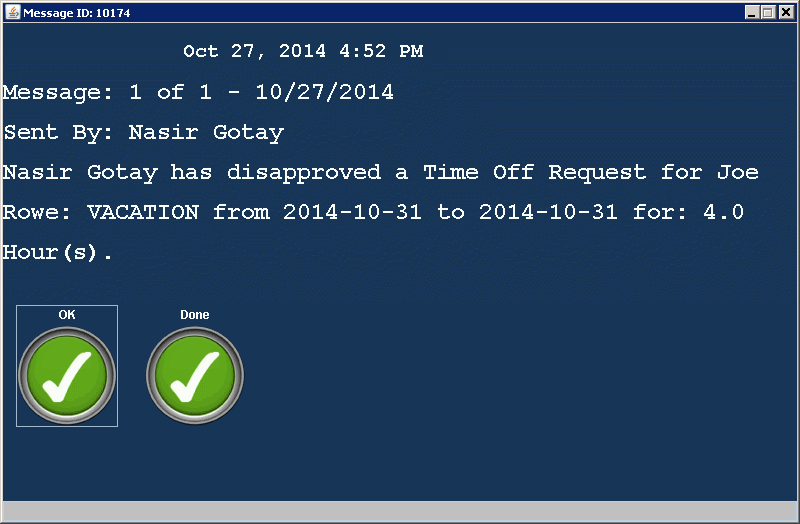
If you click Yes, the messages will appear.
If you click No, the normal menu options will appear.
Note that if the message requires acknowledgement or agreement/disagreement and you click No, you will return to the login screen. You must click Yes and view the message to continue using the client
In the Web Application:

If you click Yes, the messages will appear in the messages pop-up form.
If you click No, the web application will start normally (no messages will appear) You must use the My Messages form to view the message.
Note that if any of the messages require acknowledgement or agreement/disagreement, you will not be asked if you want to view them. The messages pop-up form will appear. You must acknowledge the message to continue using the web application.
Alert on Terminal
Check this box if you want the message to appear on a client terminal after the user logs in.

If Ask for Message is also checked, the user will first be asked whether to view the messages. If Ask for Message is not checked, the terminal will begin displaying the messages after the user logs in.
If Alert on Terminal is not checked, messages will not appear on the terminal after login. The user will have to go to the Messages form to view the messages.
Alert on Web
Check this box if you want the message to appear after the user logs into the web application.
Note: Dialog messages can only be displayed on a terminal or the Web Time Clock, even if Alert on Web is checked.

If Ask for Message is also checked, the user will first be asked whether to view the messages. If Ask for Message is not checked, the messages window will appear after the user logs into the web application.
If Alert on Web is not checked, messages will not appear in the web after login. The user will have to go to the My Messages form to view the messages.
Update Date, Updated By
These fields display when the record was created or updated, and the person who created or updated the record.
Click Main Menu > Configuration > Policies > Message Policy.
Select a Message Policy Name from the drop-down list.
You can also click the ![]() quick link button next to the Message Policy
Name field and select Lookup
from the drop-down menu. Select the Message Policy Name from the Message
Policy pop-up form.
quick link button next to the Message Policy
Name field and select Lookup
from the drop-down menu. Select the Message Policy Name from the Message
Policy pop-up form.
The triggers for the policy appear in the grid.
Click Main Menu > Configuration > Policies > Message Policy.
Click the ![]() quick link button next to the Message
Policy Name field and select Add
from the drop-down menu.
quick link button next to the Message
Policy Name field and select Add
from the drop-down menu.
On the Message Policy pop-up form, enter the Message Policy Name and Description.
Check the Use Priority, Ask for Message, Alert on Terminal, and Alert on Web boxes as necessary. Refer to the Message Policy pop-up form - Field Descriptions for more information.
Click Save.
If you want to add more than one Message Policy, click Save and Add to save your settings and keep the Message Policy pop-up form open. Or click Save to save your Message Policy and return to the main form.
Click Main Menu > Configuration > Policies > Message Policy.
Click the ![]() quick link button next to the Message Policy Name field and select
Maintain from the drop-down
menu.
quick link button next to the Message Policy Name field and select
Maintain from the drop-down
menu.
On the Message Policy pop-up form, select the Message Policy Name with the description you want to change and click Modify.
On the Modify Message Policy pop-up form, change the Description, Use Priority, Ask for Message, Alert on Terminal, and Alert on Web settings as necessary. Refer to the Message Policy pop-up form - Field Descriptions for more information.
Click Save.
Click Main Menu > Configuration > Policies > Message Policy.
Click the ![]() quick link button next to the Message Policy Name field and select
Maintain from the drop-down
menu.
quick link button next to the Message Policy Name field and select
Maintain from the drop-down
menu.
On the Message Policy pop-up form, select the Message Policy Name you want to copy and click Copy.
On the Copy Message Policy pop-up form, change the settings as necessary. Refer to the Message Policy pop-up form - Field Descriptions for more information.
If you want to make additional copies of the Message Policy, click Save and Add to save your settings and keep the Copy Message Policy pop-up form open. Or click Save to save your Message Policy and return to the main form.
Click Main Menu > Configuration > Policies > Message Policy.
Click the ![]() quick link button next to the Message Policy Name field and select
Maintain from the drop-down
menu.
quick link button next to the Message Policy Name field and select
Maintain from the drop-down
menu.
On the Message Policy pop-up form, select the Message Policy Name you want to remove and click Delete.
Click OK to confirm the action.