Set Up an Approval Hierarchy for Vendors
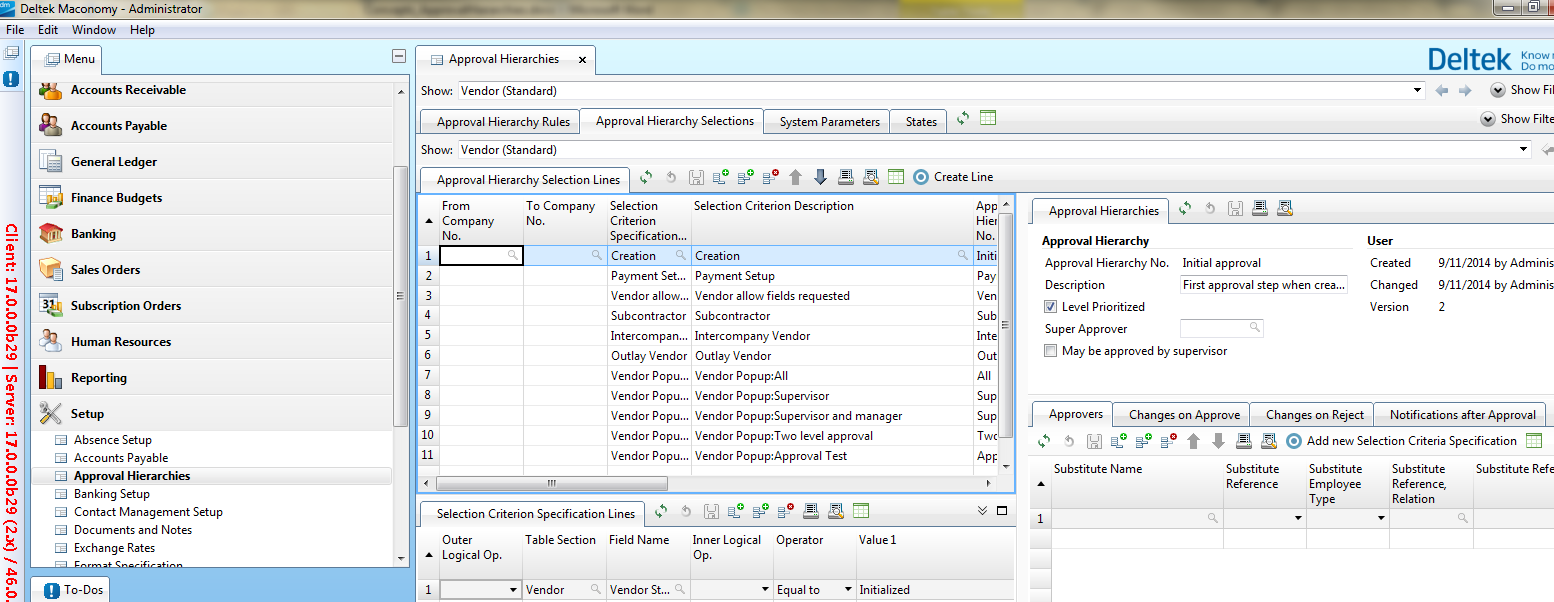
Use the Approval Hierarchy Selections tab to set up an approval hierarchy.
The following panels in this tab are used:
- Use the Selection Criterion Specification Lines and Approval Hierarchy Selection Lines panels to set up selection criteria and specify which ones have to be met by a vendor for each status.
- Use the Approvers panel to specify an approver and a substitute approver for each status. You can also specify whether to allow self-approval for an approval hierarchy line.
- Use the Approval Hierarchies panel to specify the default setting for self-approval.
- Use the Changes on Approve and Changes on Reject panels to specify what happens when a vendor is approved or rejected.
- Use the Notifications after Approval panel to specify the employee who receives a To-Do when a vendor reaches a specific status.
Use the Changes on Change panel under the Approval Hierarchy Rules tab to specify the changes to vendor information which need to go through the approval process again.
Screenshot
Notifications
None.