Add and Configure the Deltek Ajera Application
To add and configure the Deltek Ajera application:
- Go to https://portal.azure.com to launch the Entra ID portal.
- From Entra ID services, select Entra ID Active Directory.
- From the Manage menu, select App registrations.
- From the actions at the top of the menu on the App Registrations screen, Select + New registration.
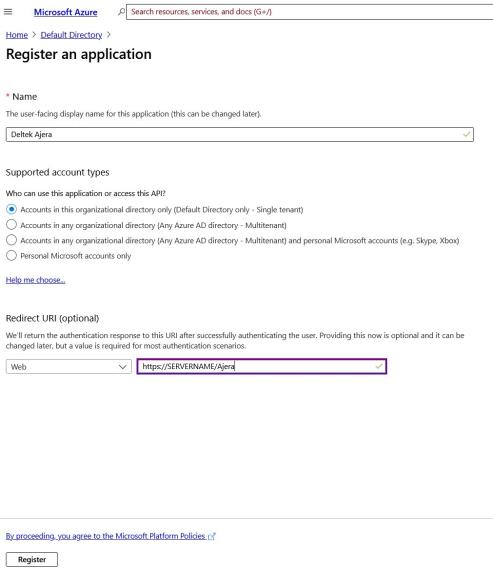
- Perform the following actions on the Register an Application screen:
- In the Name field, enter: Deltek Ajera.
- Under Supported account types, select Accounts in this organizational directory only.
- Under Redirect URI (Optional), select Web and enter your Ajera customer URL.
For example, enter: https://ajera.com/V###### (SaaS clients) or http://[ServerName]/Ajera (On-Premise clients).
- Click Register to create and save the application.
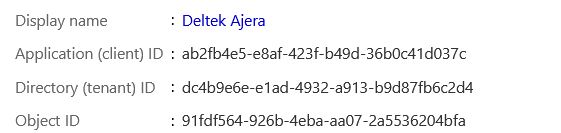
The properties of the Deltek Ajera application display.
- Click on the application that you just registered (Deltek Ajera) from the list, hover over the Application (client) ID, and click the clipboard icon to the right to store the ID for future use.
You will enter this ID into the Application (client) ID field on the Microsoft Entra ID tab in ![]() >Setup > Company > Preferences > Integration tab.
>Setup > Company > Preferences > Integration tab.
- On the same application, hover over the Directory (tenant) ID and click the clipboard icon to the right to store the ID for future use.
You will enter this ID into the Directory (tenant) ID field on the Microsoft Entra ID tab in ![]() >Setup > Company > Preferences > Integration tab.
>Setup > Company > Preferences > Integration tab.
- From the Manage menu, select Certificates & secrets.
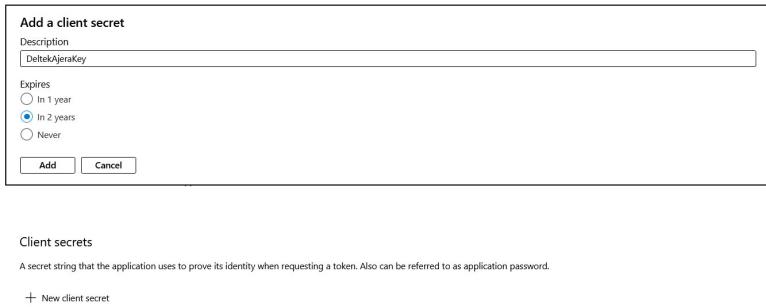
- On the Certificates and Secrets screen, click + New client secret.
- In the Description field, enter: DeltekAjeraKey.
- Under Expires, we recommend that you select In 2 years.
- Click Add to generate the secret value.
- Click the clipboard icon to the right of the secret value to save the value for future use.
You will enter this ID into the Client Secret field on the Microsoft Entra ID tab in ![]() > Setup > Company > Preferences > Integration tab.
> Setup > Company > Preferences > Integration tab.
| Caution: | This is the only time the client secret will be visible so it's important to ensure you save it for future use. |

- From the Manage menu, select Authentication.
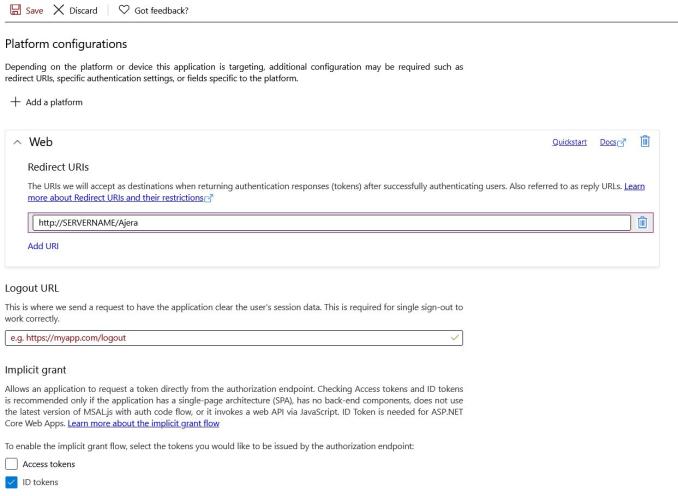
- On the Authentication screen, under Redirect URIs, perform the following actions.
Points to remember:
- Press TAB after you enter each URL.
- The URL entries are case-sensitive.
- In the Type field, select Web for each URL.
The first URL must be what users use to launch Ajera.
- In the Advanced settings section, under Implicit grant, select the ID Tokens option.
- In the Default client type section, select No in the Treat application as a public client field.
- In the Supported account types section, select the Accounts in this organizational directory only option.
- Click Save at the top.
- From the Manage menu, select API permissions.
- On the API Permissions screen, click Grant admin consent for your domain at the bottom, to make it available for end-users.
- Click Yes to grant consent for the requested permissions.