In Cobra, click the Integration tab.
In the Import group, click the project to which you are integrating (Open Plan or MS Project).
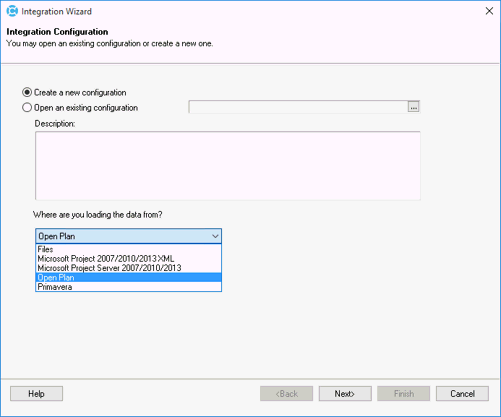
On the Integration Configuration page, in the Where are you loading the data from? drop-down list, select the product to which you are integrating (Open Plan, Microsoft Project, or Microsoft Project Server.
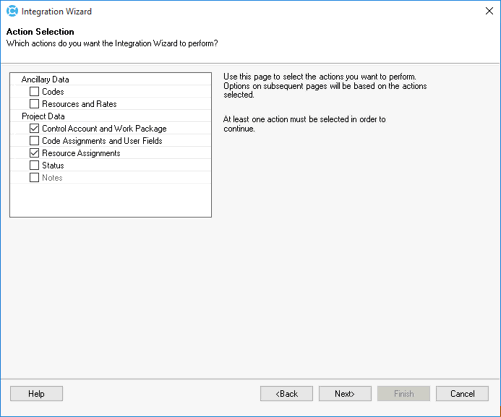
On the Action Selection page, under the Project Data heading, make the following selections:
Control Account and Work Package
Resource Assignments: It is important to select resource assignments even if you are not resource-loading your schedule. If you do not select resource assignments, you will get a "Select a Default Budget Class" error.
Code Assignments and User Fields: You can select this option if your project is linked to code assignments.
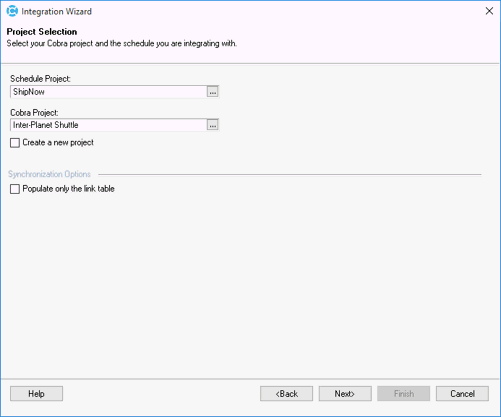
On the Project Selection page, PM Compass overrides the Schedule Project and Cobra Project fields based on the project selected in the change request.
You need to select a project that uses the same field mappings with the schedule as the one you intend to select in the change request. All projects with the same field configuration and schedule mapping can use a single change request type; however, if you have some projects with different configurations (for example, some have three key fields and some have two key fields), you need to create separate integration files and change request types for each project configuration and schedule mapping.
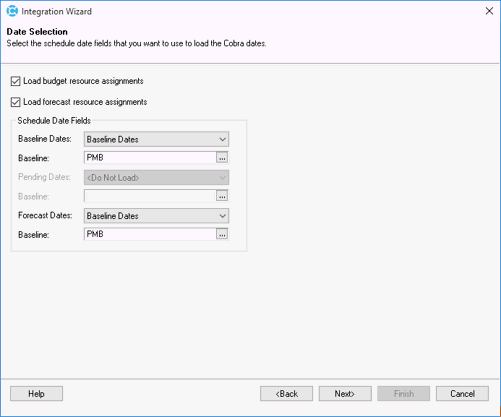
The settings on the Date Selection page are overridden to match what is defined in Workflow Type Configuration.
You should select to load both budget and forecast as well as Baseline Dates so that the remainder of the Integration Wizard pages allow you to select the proper fields.
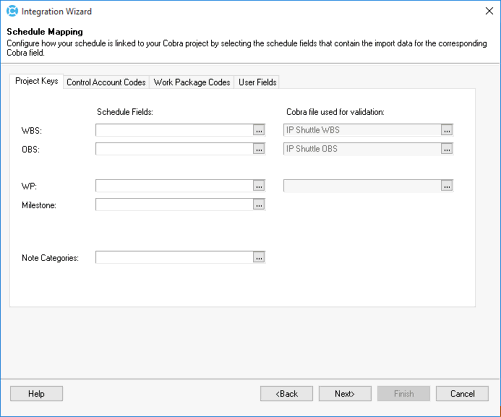
Use the Schedule Mapping page to link your project to the schedule based on your configuration settings.
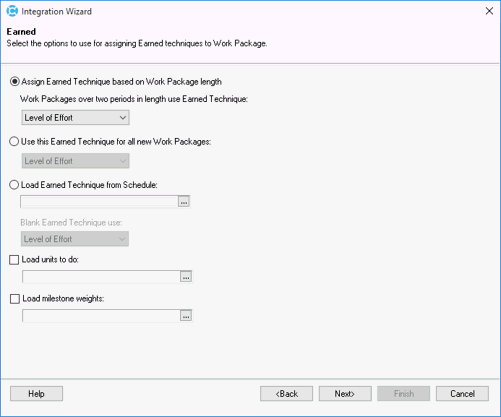
On the Earned Value page, select your preferred settings for how the earned value technique will be created.
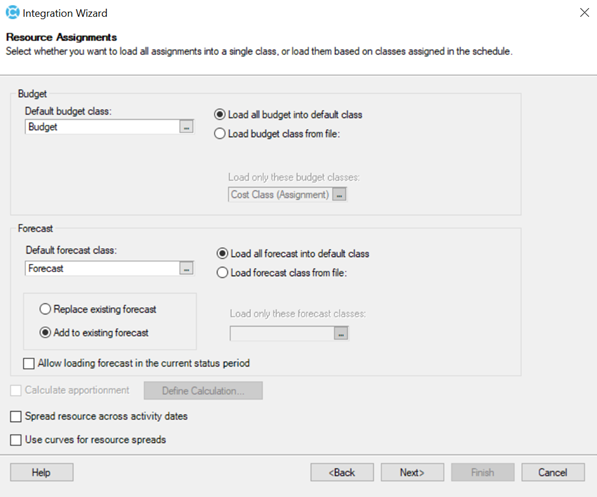
On the Resource Assignments page, select Load all budget into default class in the Budget group box for a Budget Change request.
If the Update the Forecast with the Budget Change option on the Change Details on Form tab of Workflow Type Configuration is selected, you must select the options in the Forecast group box.
For A New or Change Amount Workflow Type
Apply historical budget changes as an adjusting entry in the current status period
Force existing Work Package dates to match the schedule for Baseline
Update Control Account dates to span Work Package dates exactly
Update the description for existing Control Accounts and Work Packages
Recalculate existing milestone weights
Select Apply historical budget changes as an adjusting entry in the current status period only if you resource load your schedule and you do not want the budget before the current period to change.
For A Replacement of Existing Time Phased Data Workflow Type
Apply historical budget changes as an adjusting entry in the current status period
Force existing Work Package dates to match the schedule for Baseline
Update Control Account dates to span Work Package dates exactly
Update the description for existing Control Accounts and Work Packages
Recalculate existing milestone weights
Delete items from Cobra that are no longer in the schedule
Delete Control Accounts and Work Packages no longer in the schedule
Delete milestones no longer in the schedule
Delete resource assignments no longer in the schedule
Delete only resources with the default or selected class
List deleted items in the process log
Select Apply historical budget changes as an adjusting entry in the current status period only if you resource load your schedule and you do not want the budget before the current period to change.
Complete the Integration Wizard to save your configuration.
In PM Compass, enter the configuration file name in the Schedule Integration Configuration field on the Change Details on Form tab of Workflow Type Configuration.
When the scheduler approves a change request, the Cost System Process step action starts the schedule integration process. The process runs Cobra's API, which calls the Integration Wizard using the file selected in the Schedule Integration Configuration.