Import Shared Web Layouts
To import a Shared Web Layout:
- Launch the Windows Application.
- Click the Import Web Layouts from File button in the toolbar.
- In the Windows (File) Open dialog box, navigate to the location where Shared Web Layouts are stored, if needed.
-
Select a Shared Web Layout file and click
Open.
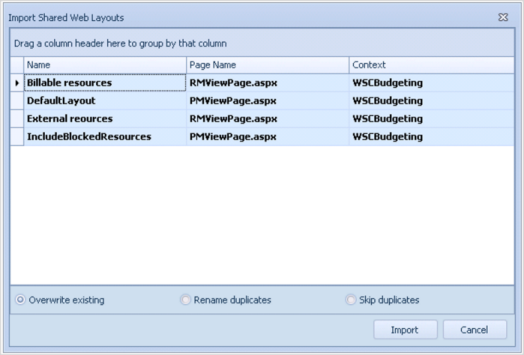
If you clicked on the name of a previously exported Shared Web Layouts file, a dialog box like the following example displays all of the Shared Web Layouts that are contained in that file. All Shared Web Layouts that are contained in the file are selected by default.

If a Shared Web Layout that has the same combination of Name, Page Name, and Context values already exists in your People Planner system, they are bolded in this list.
If you choose an existing Shared Web Layout, use the radio buttons to indicate how you want the import to be performed:
- Overwrite existing: Overwrites the existing Shared Web Layout with the imported one.
- Rename duplicates: Appends a sequential number to the name of the Shared Web Layout when it imports, increasing that number (if needed) until the name becomes unique.
- Skip duplicates: Does not import the Shared Web Layout.
- Click Import.
Parent Topic: Import and Export Shared Web Layouts