Defining a custom import mapping to get the data from a CSV file is similar to the process for defining a custom import mapping to get the data from an Excel file.
(Optional) Enter the prerequisites here. This should be relatively brief. If you need to write extensive prereq info, create a reference topic for it and combine the topics using a small ditamap. Be sure to keep the first sentence in the <p> element.
. When you have created a custom import mapping, you continue by performing the following:
-
In the
Import Type field, select
Comma Separated Values from the drop-down list.
-
In the
Local sample path field, enter the file or folder path on the server to use when running the import mapping.
Note: You cannot continue unless you choose a CSV file. If you do not yet have one, you can use an empty file.
-
Click the
Add button to open the Create Entity Mapping dialog.
-
In the
Data file encoding field, enter a value.
Because a CSV file is simply a raw text file, you also need to choose the correct value for the
Data file encoding field. If you do not know what the correct value is, you can use the preview function:
-
Click
Add to add a mapping.
-
In the
Source Table Name – CSV field, select the CSV files you want to import the data from.
-
In the Destination Entity Name field, select the People Planner table into which you want to import the external data from the drop-down list. In this example, this is
.
-
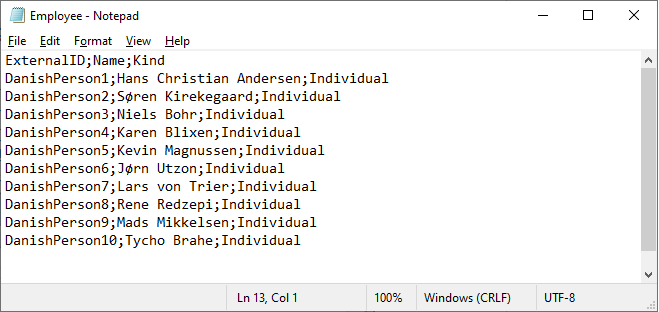
Ensure that you have at the least the columns shown in the following figure in the CSV file. The order of the columns is not important, but the names of the columns must appear as the first row. After the first row, you can have some examples of import data.
-
When you have mapped the mandatory fields, you can deselect the checkbox and map other fields that you want.
-
Click
Save when you are done defining the mapping.
CSV is an abbreviation for "comma-separated file." However, in the preceding example, the data is separated by semicolons (;) instead of commas. You can determine which list separator you should use by configuring this in your Windows settings.