
The Terminal Filtration form allows you to restrict access to terminals.
When you define a Terminal Filtration record for a specific terminal, only members of Employee Groups assigned to that terminal can use the terminal. If a terminal does not have a Terminal Filtration record, then no persons will be restricted from using the terminal.
If a terminal is OFFLINE, its Terminal Filtration settings will not apply; no persons will be restricted from using the terminal. When the terminal comes back online, however, any unauthorized transactions (entered by users who are not assigned to the terminal’s filtration group) will receive errors.
You can restrict access to terminals based on the following Employee Group Types:
Terminal Filtration
Facility
Hierarchy (Organization)
See Also:
Terminal Filtration Using Terminal Filtration Groups
Terminal Filtration by Facility
Terminal Filtration by Department (Organization Hierarchy)
Terminal Filtration Field Descriptions
Find Terminal Filtration Records
Add a Terminal Filtration Record
Modify or Delete a Terminal Filtration Record
Copy a Terminal Filtration Record
Terminal Filtration can be used with the following Terminal Types:
InTeract Client
InTouch
B-Net 9520
B-Net 9540 ATM Style
B-Web 9300/9500
LANpoint Windows CE
Motorola MC75
Pocket PC
Terminal Filtration cannot be used with the Web Time Clock, Mobile Client, or BlackBerry client.
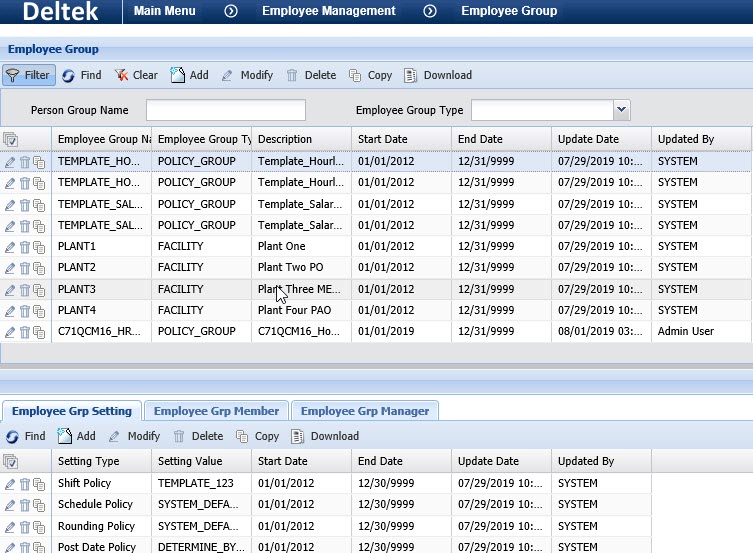
A Terminal Filtration Group is a type of Employee Group that is only used on the Terminal Filtration form. You must define the individual members of a Terminal Filtration Group.
Terminal Filtration Groups are defined on the Employee Group form. To add members to this group, use the Employee Group Member tab.
To restrict access to terminals based on Terminal Filtration Groups, create a Terminal Filtration record with Terminal Filtration as the Employee Group Type. Then use the Employee Group Name field to select which Terminal Filtration Groups to include.
To restrict access to terminals based on Facility, you must first define your facilities and members.
Facilities are defined on the Employee Group form. To add members to a facility, use the Employee Group Member tab.
When you create the Terminal Filtration record, select Facility as the Employee Group Type. Then use the Employee Group Name field to select which facilities (Employee Groups of type FACILITY) to include.
You can also restrict access to terminals based on a specific Organizational Hierarchy Element (such as a Department). These elements are defined for a Facility by the HR Hierarchy Name and HR Hierarchy Level on the Employee Group Settings form.
To configure Terminal Filtration by Hierarchy (Organization):
Define the Organizational Hierarchy using the Hierarchy Definition and Hierarchy Elements forms.
Define the Facility on the Employee Group form. Use the Employee Group Member tab to add persons to the group.
Define the HR Hierarchy Name and HR Hierarchy Level for this Facility using the Employee Group Setting tab.
When you create the Terminal Filtration Group, select Hierarchy (Organization) as the Employee Group Type. Then, select the Facility you defined in step 2. Finally, use the Employee Group Name field to select the hierarchical elements to include.
If employees will be using Transient Assignment events to transfer to different departments, make sure these events are configured properly.
Terminal Filtration restrictions will not apply when a person is “in transit” after starting a TRANSFER_LOCATION event. A person can use a TRANSFER_LOCATION event to move to a different department (or other hierarchy location) for part of the day. See Transient Assignments for more information.
For example, an employee is assigned to the Assembly department and clocks in at this department’s terminal in the morning. In the afternoon, the employee is sent to work to the Shipping department. The employee starts a TRANSFER_LOCATION event at the Assembly terminal and walks over to the Shipping department. Normally, the employee cannot use the Shipping department terminal because he does not belong to its Terminal Filtration record. However, because he is “in transit,” the employee can use any terminal in the building. The employee uses the Shipping terminal to stop the TRANSFER_LOCATION event and begins working in the Shipping department. The employee now has a transient assignment in the Shipping department and clocks out at the Shipping terminal at the end of the day.
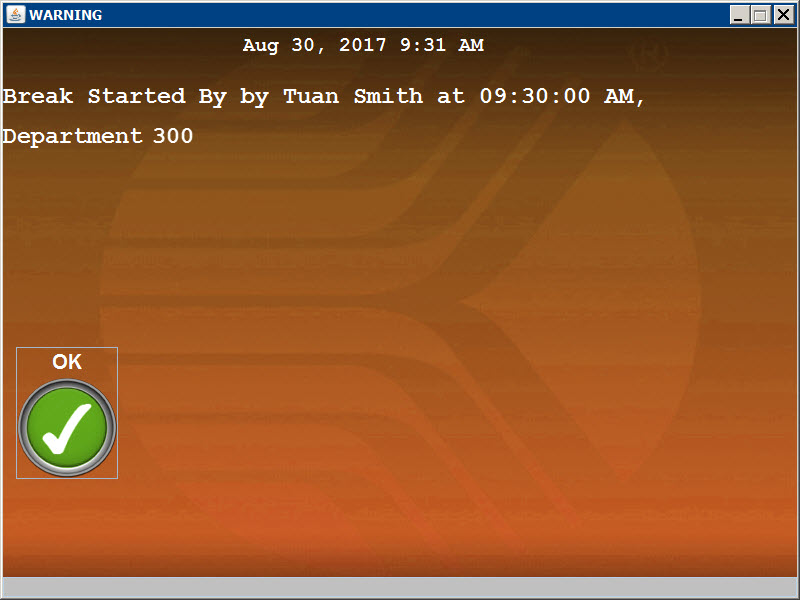
When an event posts successfully from a terminal, a message displays (e.g., “Clock In Successful”). You can include the rounded time and the department name in this success message.
Click Main Menu > Configuration > Form Configuration > Dictionary Label.
In the Label Name field, enter 25245 and click Find.
Select the message and click Modify.
Change the Long Label from:
[%EVENT_STAGE_MESSAGE%] [%PERSON_NAME%]. ([%EVENT_NAME%] [%SUCCESS_CODE_MESSAGE%]).
To:
[%EVENT_STAGE_MESSAGE%] by [%PERSON_NAME%] at [%ROUNDED_TIME%], Department [%DEPARTMENT_NAME%]
GID, DID
Group Identifier and Device Identifier for the terminal. Defined on the Terminal form.
See above for a list of terminals that support Terminal Filtration.
Terminal ID
ID number for the terminal. Typically a combination of the GID and DID. Also defined on the Terminal form.
Terminal Name
Name of the terminal as defined on the Terminal form.
Employee Group Type
Type of Employee Group that will be able to use the terminal. Available options are Terminal Filtration, Facility, and Hierarchy (Organization).
Employee Group Name
Name of the Employee Group that can use the terminal. The available Employee Group Names will depend on the record’s Employee Group Type.
If the Employee Group Type is Terminal Filtration, the Employee Group Name field will display the name of a Employee Group of type TERMINAL_FILTRATION, defined on the Employee Group form.
If the Employee Group Type is Facility, the Employee Group Name field will display the name of a Employee Group of type FACILITY, defined on the Employee Group form.
If the Employee Group Type is Hierarchy (Organization), the Employee Group Name field will display the name of a Hierarchy Element that corresponds to a specific Facility’s HR Hierarchy Name and HR Hierarchy Level settings. See Terminal Filtration by Department (Organization Hierarchy) for more information.
Update Date, Updated By
These fields display when the record was created or updated, and the person who created or updated the record.
Click Main Menu > Configuration > Terminal > Terminal Filtration.
If necessary, click the ![]() Filter button at the top of the form to display the filter fields.
Filter button at the top of the form to display the filter fields.
Select the GID, DID, Employee Group Type, or Employee Group Name of the records you want to view.
Click Find.
The records that match your filter criteria will display in the middle of the form.
Click Main Menu > Configuration > Terminal > Terminal Filtration.
Click Add.
Select the Terminals you want to include in your Terminal Filtration record. Move the terminals from the Available column to the Selected column to include them.
Select the Employee Group Type of the persons who will be able to use the selected terminals (Terminal Filtration, Facility, or Hierarchy/Organization).
The Facility field is enabled if you selected Hierarchy (Organization) as your Employee Group Type.
Use the Employee Group Name field to select the Terminal Filtration Groups, Facilities, or Hierarchy Names you want to include. Move the groups from the Available column to the Selected column to include them.
The available options will depend on the Employee Group Type you selected.
If you selected Terminal Filtration as your Employee Group Type, you will need to select the Terminal Filtration Groups you want to include. The available options are Employee Groups of type TERMINAL_FILTRATION, defined on the Employee Group form.
If you selected Facility as your Employee Group Type, you will need to select the facilities you want to include. The available options are Employee Groups of type FACILITY, defined on the Employee Group form.
If you selected Hierarchy (Organization) as your Employee Group Type, you will need to select Hierarchy locations for a specific Facility. The available locations are determined by the Facility’s HR Hierarchy Name and HR Hierarchy Level settings. See Terminal Filtration by Department (Organization Hierarchy) for more information.
If you want to add more than one Terminal Filtration record, click Save and Add to save your settings and keep the Add Terminal Filtration window open. Or click Save to save your Terminal Filtration record and return to the main form.
You can modify the following fields in a Terminal Filtration record:
Employee Group Type (Terminal Filtration, Facility, or Hierarchy/Organization)
Facility (if you selected Hierarchy/Organization as your Employee Group Type)
Employee Group Name
To modify a Terminal Filtration record, select it and click Modify. Modify the available fields and click Save.
To delete a Terminal Filtration record, select it and click Delete. Click OK to confirm the action.
To duplicate a Terminal Filtration record, select it and click Copy. You can modify all of the fields in the record. See Add a Terminal Filtration Record for information on configuring these fields.
Make sure all the fields have the correct values before you save the duplicate record. When you are done, click Save and Add or Save.