| Field | Description |
|---|
| Period Ending
|
This field displays the end date of the timesheet labor period. This is the last day for which you can charge time to this timesheet.
|
| Period Status
|
Each timesheet labor period has a status value. Labor periods are either:
- Open: The labor period is open for processing. You can open a timesheet, enter and edit data, and submit.
- Closed: The labor period is closed for processing. You can open and copy a timesheet, but you cannot enter or edit timesheet data, or submit.
-
Closed to Staff: This status is only shown when the labor period status is set to
Administrators in Vision and you have group, company, or system level rights set in Vision Employee Info Center. You can open and copy your timesheet, enter and edit data, and submit it if resubmitting is allowed.
-
Closed to Group Admin: This status is only shown when the labor period status is set to
System Administrators in Vision and you have company or system administration level rights set in Vision Employee Info Center. You can open and copy your timesheet, enter and edit data, and submit.
|
| Timesheet Status
|
The status of the timesheet displays on the Timesheet, the Open dialog box, and the Copy dialog box. This status is important because it reflects the current processing stage of the timesheet and determines what access rights are available. Your system administrator can change the status of a timesheet at any time prior to posting the timesheet. Status options are:
- Missing: No timesheet is created for this time period. You can select the labor period and create a new timesheet for the period. The status value automatically changes to
In Progress. Note that Missing displays as <Blank> on the Open dialog box.
- In Progress: This timesheet is in the process of being completed and has not been submitted. You can enter timesheet data and edit timesheet data.
- Submitted: The timesheet is submitted for processing, but has not been approved. You can open the timesheet, but you cannot enter or edit timesheet data unless your security access allows you to resubmit timesheets.
- Approved: The timesheet has been approved and is ready to be posted. You can open the timesheet, but you cannot enter or edit timesheet data unless your Timekeeper Administrator allows you to resubmit timesheets.
- Posted: The timesheet has been posted. You can open the timesheet, but you cannot enter or edit timesheet data.
|
| Totals
|
Slide the
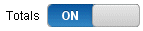 button to the
ON position to turn the timesheet totals rows and columns on. The default for this option is
ON. button to the
ON position to turn the timesheet totals rows and columns on. The default for this option is
ON.
If overtime hours can be assigned, the timesheet
Regular,
Overtime,
Overtime-2, and
Total
hours display. If overtime hours are not assigned, the
Total row and column display.
|
| Project
|
Use this field to select the project number to which you are charging time. The records that are available to choose from depend on the following settings:
- Apply Project access to Timesheets: If this option is selected on the Record Access tab of
, the list of available projects is filtered by your role's project record level access (set up on the same tab).
- Treat inactive projects/plans as dormant: If this option is selected on the Company Timesheet tab in
, you can only view and select active projects. You can never select dormant records.
To select a project record, complete one of the following:
- Enter all or part of a project number or name. After you tab or press
Enter, Navigator uses the Quick Find feature to default the exact match or populate the lookup list with potential matching records.
- Click the
 lookup button to use the Project/Phase/Task Lookup. If the
Automatically retrieve records when opening lookups option is selected on the General tab of
, the Project/Phase/Task lookup opens with projects displayed in the Project column. Otherwise, you have to use the
Search button on the dialog to display a list of projects. You can use the
Sort drop-down to sort the project list by
Name or
Number. lookup button to use the Project/Phase/Task Lookup. If the
Automatically retrieve records when opening lookups option is selected on the General tab of
, the Project/Phase/Task lookup opens with projects displayed in the Project column. Otherwise, you have to use the
Search button on the dialog to display a list of projects. You can use the
Sort drop-down to sort the project list by
Name or
Number.
The settings in the Show Timesheet Left Grid Options group box in
determine if the project column is shown.
|
| Project Name
|
If the Project column is displayed, this column displays the name of the project and it is not editable. If the Project column is not displayed, use this field to select the project to which you are charging time. The records that are available to choose from depend on the following settings:
- Apply Project access to Timesheets: If this option is selected on the Record Access tab of
, the list of available projects is filtered by your role's project record level access (set up on the same tab).
- Treat inactive projects/plans as dormant: If this option is selected in
, you can only view and select active projects. You can never select dormant records.
To select a project record, complete one of the following:
- Enter all or part of a project number or name. After you tab or press enter, Navigator uses the Quick Find feature to default the exact match or populate the lookup list with potential matching records.
- Click the
lookup button to use the Project/Phase/Task Lookup. If the
Automatically retrieve records when opening lookups
option is selected on the General tab of
, the Project lookup opens with projects displayed in the Project column. Otherwise, you have to use the
search button on the dialog to display a list of projects. You can use the Sort drop-down to sort the project list by Name or Number.
- If the selected project has phases and the selected phase has tasks, you must select a project, phase, and task before you can use the
Finish button.
The settings in the Show Timesheet Left Grid Options group box in
determine if the project name column is shown.
|
| Client Name
|
The name of the client who is associated with the project displays, but is not editable. The settings in the Show Timesheet Left Grid Options group box in
determine if the client name is shown.
|
| Phase
|
This field is available if the project you selected has associated phases. Use this field to select the phase number to which you are charging time. The records that are available to choose from depend on the project that was selected and the following setting:
Treat inactive projects/plans as dormant: If this option is selected in
, you can only view and select active phases. You can never select dormant records.
To select a phase record:
- Select the project to which you are charging time. If there are associated phases, Navigator displays them in the Phase column in the Project/ Phase/Task Lookup dialog box. Select the respective phase from the phase column and click
Finish. If the selected phase has tasks, you must select a phase and task before you use the
Finish button on the lookup dialog.
You can modify the individual phase selection, if needed.
- Enter all or part of a phase number or name in the respective Phase column. After you tab or press enter, Navigator uses the Quick Find feature to default the exact match or populate the lookup list with potential matching records.
- Click the
lookup button in the respective Phase column on the timesheet line to access the Phase/Task Lookup and change your selection. The phases are automatically displayed when the dialog opens. If the selected phase has tasks, you must select a task before you use the
Finish button on the lookup dialog. You can use the Sort drop-down to sort the phase list by Name or Number.
|
| Phase Name
|
If the Phase column is displayed, this column displays the name of the phase and it is not editable. If the Phase column is not displayed, use this field to select the phase to which you are charging time. The records that are available to choose from depend on the following setting:
Treat inactive projects/plans as dormant: If this option is selected in
, you can only view and select active phases. You can never select dormant records.
To select a phase record:
- Select the project to which you are charging time. If there are associated phases, Navigator displays them in the Phase column in the Project/ Phase/Task Lookup dialog box. Select the respective phase from the phase column and click
Finish. If the selected phase has tasks, you must select a phase and task before you use the Finish button on the lookup dialog.
You can modify the individual phase name selection, if needed.
- Enter all or part of a phase number or name in the respective Phase column. After you tab or press enter, Navigator uses the Quick Find feature to default the exact match or populate the lookup list with potential matching records.
- Click the
lookup button in the respective Phase Name column on the timesheet line to access the Phase/Task Lookup and change your selection. The phases are automatically displayed when the dialog opens. If the selected phase has tasks, you must select a task before you use the Finish button on the lookup dialog. You can use the Sort drop-down to sort the phase list by Name or Number.
The settings in the Show Timesheet Left Grid Options group box in
determine if the phase column is shown.
|
| Task
|
This field is available if the phase you selected has associated tasks. Use this field to select the task number to which you are charging time. The records that are available to choose from depend on the project and phase that were selected and the following Vision setting:
Treat inactive projects/plans as dormant. If this option is selected in
, you can only view and save active tasks. You can never select dormant records.
To select a task record:
- Select the project and phase to which you are charging time. If there are associated tasks, Navigator displays them in the Task column in the Project/Phase/Task Lookup dialog box. Select the respective task from the task column and click Finish.
You can modify the individual task selection, if needed.
- Enter all or part of a task number or name in the respective Task column. After you tab or press enter, Navigator uses the Quick Find feature to default the exact match or populate the lookup list with potential matching records.
- Click the
lookup button in the respective Task Name column on the timesheet line to access the Task Lookup and change your selection. The tasks are automatically displayed when the dialog opens. You can use the Sort drop-down to sort the task list by Name or Number.
The settings in the Show Timesheet Left Grid Options group box in
determine if the task column is shown.
|
| Task Name
|
If the Task column is displayed, this column displays the name of the task and it is not editable. If the Task column is not displayed, use this field to select the task to which you are charging time. The records that are available to choose from depend on the following setting:
Treat inactive projects/plans as dormant: If this option is selected in
, you can only view and save active tasks. You can never select dormant records.
To select a task record:
- Select the project and phase to which you are charging time. If there are associated tasks, Navigator displays them in the Task column in the Project/Phase/Task Lookup dialog box. Select the respective task from the task column and click Finish.
You can modify the individual task name selection, if needed.
- Enter all or part of a task number or name in the respective Task column. After you tab or press enter, Navigator uses the Quick Find feature to default the exact match or populate the lookup list with potential matching records.
- Click the
lookup button in the respective Task column on the timesheet line to access the Task Lookup and change your selection. The tasks are automatically displayed when the dialog opens. You can use the Sort drop-down to sort the task list by Name or Number.
The settings in the Show Timesheet Left Grid Options group box in
determine if the task column is shown.
|
| Labor Code
|
This field displays the Labor Code Number if
Number is selected in the Labor Code field on the Setup tab in
. To view the Labor Code Name, open the Labor Code lookup.
Your system administrator can set up default labor codes for individual Timesheet users. If one is defined for you, it automatically displays in the Labor Code field on your timesheet, and your ability to change it depends on the settings on the Time tab in the
.
If there is no pre-defined labor code, you can enter one directly in this field, or use the Quick Find or the Labor Code lookup features to select a code from the database.
Note: If your system administrator or project manager defines budgeted labor codes for individual projects, your default labor code may not default. In addition, if you select a non-budgeted code, you might receive a warning or error message when you submit your timesheet.
|
| Labor Category
|
Your system administrator can set up default labor categories for individual Timesheet users. If one is defined for you, it automatically displays in the Labor Category field on your timesheet.
This field displays the Labor Category if
Name
is selected in the Labor Category field on the Setup tab in
.
If there is no pre-defined labor category, you can enter one directly in this field, or use the Quick Find or the Labor Category lookup features to select a category from the database. If the
Automatically retrieve records when opening lookups option is selected on the General tab of
, the Labor Category Lookup opens with labor categories displayed.
|
| Payroll Tax Locale
|
This field displays the defaulted payroll tax locale's code. You cannot change the locale within Navigator. The Payroll Tax Locale displays if you are using
and the
Allow project's tax locale to be overridden on timesheet options is selected on the General tab of
.
|
| Day/Date
|
Use the Day/Date field to assign the hours you worked that day. The hours you assign in the field default as regular hours. If you worked regular and overtime hours, enter the hours in the separate fields located in the lower left area. The sum of any hours entered in the separate fields displays in the grid's Day/Date field.
The Limit timesheet entry to hour increment setting in
controls what rounding and decimal settings apply to the user's entry. For example, if it is set to tenths and you enter 1.25, the system shows 1.3. If it is set to whole and you enter 1.5, the system shows 2.
You can enter whole hours (1.00), partial hours (.50), or a combination of whole and partial hours (1.50) but no more than 24 total hours in one day.
If the entry for a Day/Date field includes any overtime hours or has a comment assigned, the field is locked in the grid and all edits must be made using the fields located in the lower left portion of the timesheet.
|
| Regular
|
Use this field, located in the lower left portion of the timesheet, to enter the number of regular hours worked on the day when you also worked overtime. Click the
Day/Date field that corresponds to the day for which you are charging time to the project, phase, task, labor code, labor category, payroll tax locale combination.
The Limit timesheet entry to __ hour increment
setting in
controls what rounding and decimal settings apply to the user's entry. For example, if it is set to tenths and you enter 1.25, the system shows 1.3. If it is set to whole and you enter 1.5, the system shows 2. You can enter whole hours (1.00), partial hours (.50), or a combination of whole and partial hours (1.50) but no more than 24 hours in one day.
|
| Overtime
|
This field displays in the lower left portion of the timesheet if
Allow users to enter overtime
is selected on the Setup tab in
. Click the Day/Date field in the timesheet grid that corresponds to the day for which you are charging overtime to a selected project, phase, task, labor code, labor category, payroll tax locale combination. Click the Overtime field and enter your hours.
The Limit timesheet entry to ___ hour
increment setting in
controls what rounding and decimal settings apply to the user's entry. For example, if it is set to tenths and you enter 1.25, the system shows 1.3. If it is set to whole and you enter 1.5, the system shows 2. You can enter whole hours (1.00), partial hours (.50), or a combination of whole and partial hours (1.50). Your company can set a standard overtime rate (Overtime) and a secondary overtime rate (Overtime-2). Contact your supervisor if you also see an Overtime-2 field and do not know which field to enter your overtime hours in.
|
| Overtime-2
|
This field displays in the lower left portion of the timesheet if Secondary Overtime is selected on the General tab of
. Click the Day/Date field that corresponds to the day for which you are charging time to a selected project, phase, task, labor code, labor category, payroll tax locale combination. Click the Overtime-2 field and enter your hours.
The Limit timesheet entry to ___ hour
increment setting in
controls what rounding and decimal settings apply to the user's entry. For example, if it is set to tenths and you enter 1.25, the system shows 1.3. If it is set to whole and you enter 1.5, the system shows 2.
You can enter whole hours (1.00), partial hours (.50), or a combination of whole and partial hours (1.50). Your company can set a standard overtime rate (Overtime) and a secondary overtime rate (Overtime-2). Contact your supervisor if you see an Overtime-2 field and do not know which field to enter your overtime hours in.
|
| Comments
|
This field records a comment that applies to the hours charged for the selected day and project, phase, task, labor code, labor category, and payroll tax locale combination. You can enter a comment directly in this field, or select an existing comment from the
Comment drop-down list, which includes:
- Comments previously entered on this timesheet.
- Comments copied from another timesheet.
- Global comments entered on the Global Comments tab of
.
|
| Status
|
When you select the hours field in a timesheet line, this field displays the timesheet line item approval status. This status is determined by the principal, project manager, and/or supervisor that reviews and then approves or rejects individual labor charges for the project.
|
 and select
Employee.
Navigator first attempts to open a timesheet automatically by performing the following:
and select
Employee.
Navigator first attempts to open a timesheet automatically by performing the following:
 and select Open.
The Open timesheet dialog box displays.
and select Open.
The Open timesheet dialog box displays.
 focus indicator displays to indicate that the row is active. When you select any other row that you can edit, copy, delete or insert a row below, a
 displays to indicate that the row is active. If you see
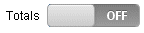 Totals button to the
OFF
position to turn the timesheet totals off.
Totals button to the
OFF
position to turn the timesheet totals off.
 or
or