Video Markup Tools
The video markup tools are available only when you open video-based Assets.
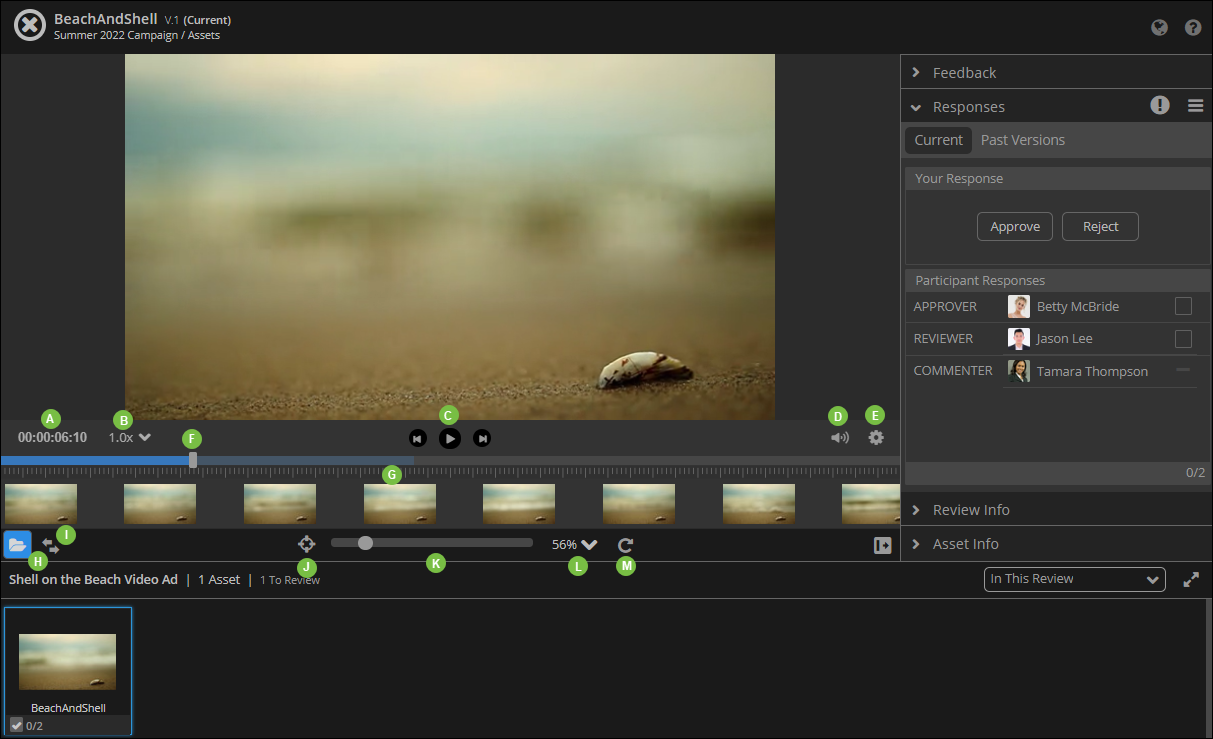
| Legend | Description |
|---|---|
| A |
Digital Timer. It enables you to track your progression through the video. |
| B |
Playback Rate Selector . It enables you to control the video speed. The speed range is from 0.2x to 2.0x. |
| C |
Previous Frame, Play Video, Forward Frame. Use these buttons to navigate to the appropriate section of the video. |
| D |
Volume Selector. Use this to review audio content along with the visuals. |
| E |
Settings
|
| F |
Video Scrubber. This is a slider control that lets you seek any time position within the video. When adding feedback, the screen provides a digital timer reading and lets you span frames for a more targeted feedback. You can select the Span Frames checkbox to specify a timeline in the video. |
| G |
Film Strip Tool. It displays a frame by frame view of the video file. You can click a video thumbnail to jump to that specific frame. |
| H |
Asset Explorer. It opens the view at the bottom of the screen that displays thumbnails of related Assets. It also displays the versions of the asset.
Note: If you view this section from a Review, the asset explorer displays only the Assets in the specific Review.
|
| I |
Compare Lab. It enables you compare the asset that is currently open with another version of itself, or a related asset in the same Project. |
| J |
Reset. Use the tool for applying the default asset size (Fit to Screen). |
| K |
Zoom Slider. It enables you to smoothly zoom in and out to adjust your view of an asset. |
| L |
Default Zoom. Access the zoom options via the chevron.
|
| M |
Rotate. The tool rotates the asset clockwise by 90 degrees. |