Lesson 1: Preparing it for distribution
In this topic, you will learn how to distribute custom reports, custom inquiries, and financial statements that you or a consultant create.
Distribute reports
Standard reports appear automatically on the Reports menu for all employees who have security settings that allow them to see the reports.
In this lesson, you'll learn about distributing:
- Reports produced with report views
- Custom reports designed in Microsoft SQL Server Reporting Services 2005
Reports produced with report views
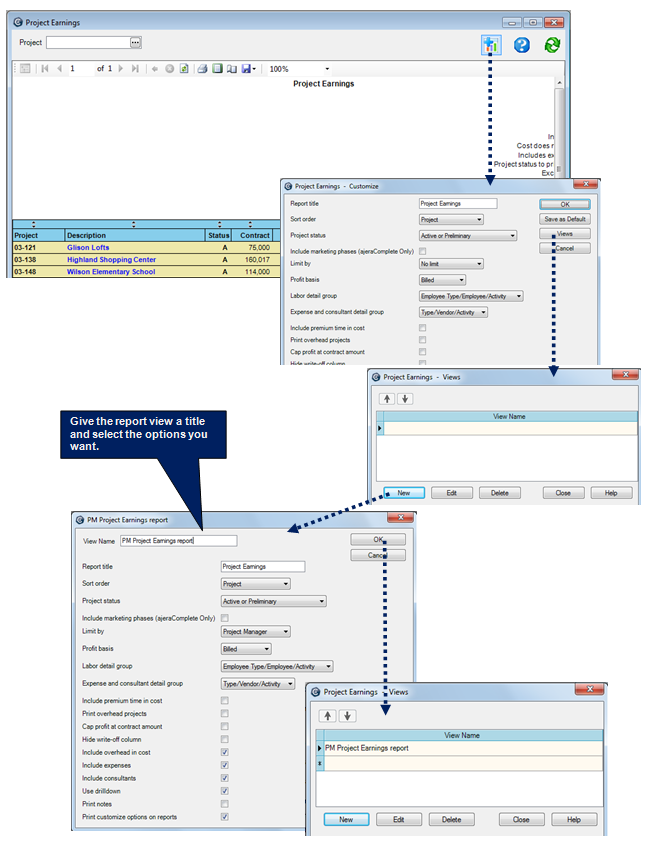
You can save options for the way you produce a report by creating a report view. You can then also distribute the report (produced with the options you saved) to others.
You run a report view just like a report; however, it produces a report based on report options that you already selected. The report view appears on the Reports menu for yourself and any others you give access to it through their security settings.
You might want to create a report view for a report if:
- Different employees will want to produce the report using the same options.
- You want to create several versions of a report, each produced with different options.
- You want different employees to see a version of a report with information that only pertains to them.
For example, you may want project managers to see the Project Earnings report with only their projects on it. You would create a view for the Project Earnings report and select Project Manager in the Limit By field.

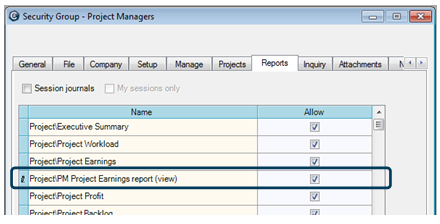
If you want any other employees to have access to the report view, you must provide access to the appropriate employees through Company >
Custom reports
Before you begin
- Ensure that the custom report is in a Microsoft SQL Server Reporting Services 2005 file, which has an extension of .rdl.
To set up a custom report
You can set up either your own report or a standard Ajera report that you modify as a custom report:
- To use your own report, ensure that the .rdl file is in a location you can access, such as a shared network folder or your desktop.
- To use a standard Ajera report:
- Copy the report from the \Ajera\Program\Standard Reports folder on the network drive where Ajera Server is installed to a location you can access, such as a shared network folder or your desktop.
- Using Microsoft SQL Server Reporting Services 2005, modify the report and save it as an .rdl file, with a new file name.
To add a custom report
- From the Reports menu, click Manage Custom Reports.
- Click the Add button, navigate to the <custom report>.rdl file, and click Open to add the report to the Ajera database. The custom report appears in the Manage Custom Reports window.
| Note: |
To select multiple custom reports, shift-click the .rdl files. If the custom report you add has the same name as an existing report, the new report will override the current report. |
-
Do the following:
Field Description Active
Select this check box so that the report appears on the Reports menu and is available for use.
Name
Change the name of the report, if needed.
Category
Type the name of the Reports submenu where you want the report to appear. If this field is blank, the report appears on the main Reports menu.
Crystal Report View only. If this check box is selected, it indicates that the report is a Crystal Report, which you cannot add, delete, or export in this window. Crystal Reports have an extension of .rpt.
- Click Save. The report appears on the Reports menu where you can select and run it like any other report.
To enable other employees to see this report, select
it on the Reports tab for the employees'
To return to this course, click the Back button.
Distribute inquiries
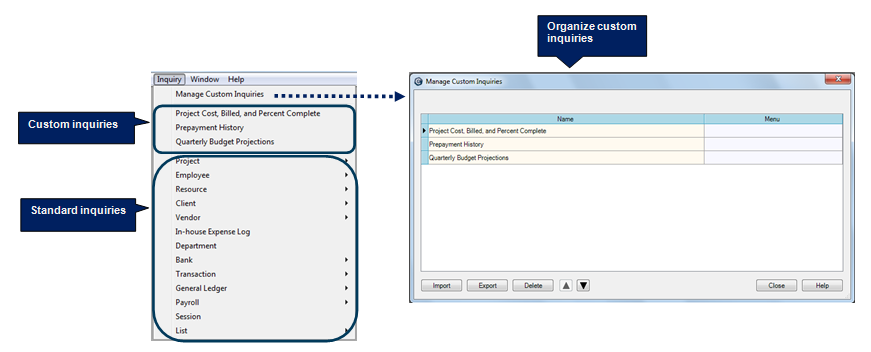
Standard inquiries and custom inquiries appear automatically on the Inquiry menu for all employees who have security settings that allow them to see inquiries. You'll learn more about security settings in the next lesson.
Show data pertaining only to a specific employee
You can set a condition for an inquiry so that the inquiry shows only the data pertaining to the employee who is viewing it.
For example, you set a condition for the Payroll Accrual inquiry (Employee Key Is Current User). When employees log into Ajera and use the inquiry, they see only their accrued hours, not their coworker's hours.
To set a current user condition for an inquiry:
- Open the inquiry for which you want to set the current user condition. From the
- Click
 in the upper right of the window. The Inquiry Properties window appears.
 - Click the Conditions tab.
- In the field that contains text asking you to select a column, click the arrow
 and select an employee key field (for example, Project Manager Key).
 - In the field to the right, select Is Current User.
- Click OK.
You can also show data in a column or link so it pertains only to the employee who is viewing it. For more, information see Showing inquiry data pertaining only to the user. To return to this course, click the Back button.
Organize custom inquiries for distribution
You want your custom inquiries to be easy to find and easy to use. This is especially important if you plan to share them with others. It's easy to change where an inquiry appears on the
| To | Do this |
|---|---|
|
Change the order of an inquiry |
|
|
Group inquiries together in a submenu |
You can list inquires together in a submenu. For example, you may want to list several inquiries (Projects by principal, Projects by location, and Projects by project manager) together on
|
|
Move an inquiry to a different submenu |
|
|
Move an inquiry to the main menu |
|
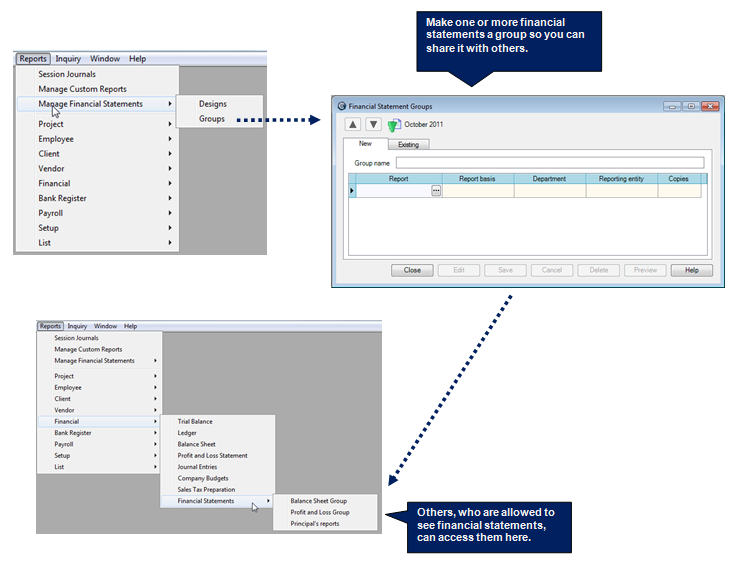
Distribute financial statements
To share a financial statement that you designed, you create a statement group for it. You can create a statement group for either one statement only or for several statements you want to package together in a bundle.
Test your knowledge
Quiz: Preparing it for distribution
Next