Lists and tables
You'll learn how to use some basic features that will help you to quickly find what you need and change what you see in a ![]() > task
> task
To see it all in action, watch the Working with lists and tables video lesson (5:00)  .
.
Overview
Lists
In Ajera ![]() > tasks
> tasks
Different types of lists show different types of information and therefore have different features.
Tables
Often, detailed information appears in a ![]() > task
> task
Find a name or description quickly
On ![]() > task
> task
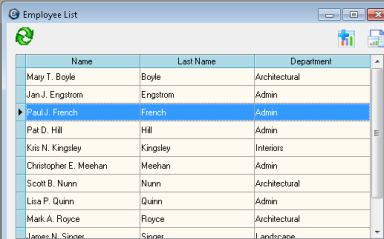
Ajera highlights the best fit for the name or description.
Change the order
When you see these arrows on a ![]() > task
> task
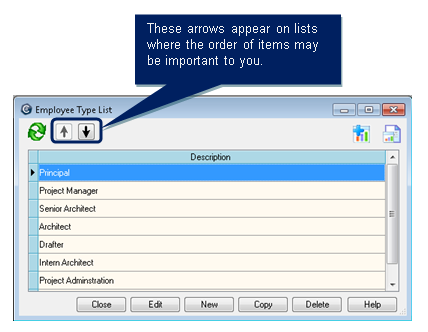
To change the order of an item, click it and then click the arrow.
Use buttons - a refresher
As you learned earlier in this lesson, use these buttons on ![]() > task
> task
- Show or hide columns by clicking
 (Customize). This change remains in effect until you change it again.
 - Change the information you are currently viewing by clicking
 (Change View). This change remains in effect until you close the window.
 - If you are working with multiple users or have multiple sessions running, update the list with the most current information by clicking
 (Refresh).
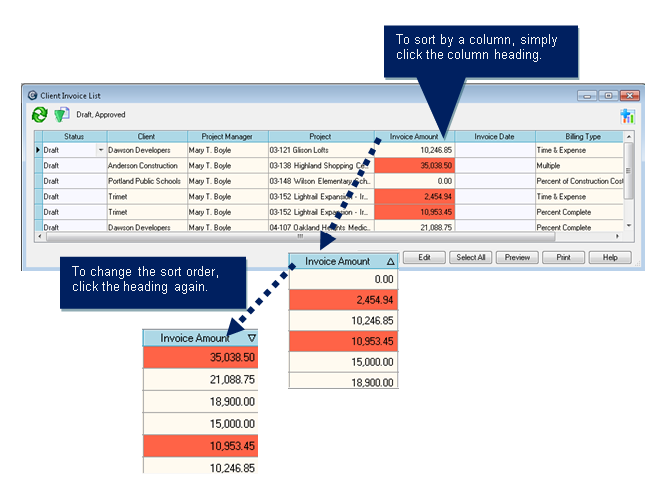
Sort by a column
You can sort ![]() > task
> task
Limit, or filter, information
In ![]() > task
> task
For example, you want to see invoices for only the Lightrail project. Here's how you would do it:
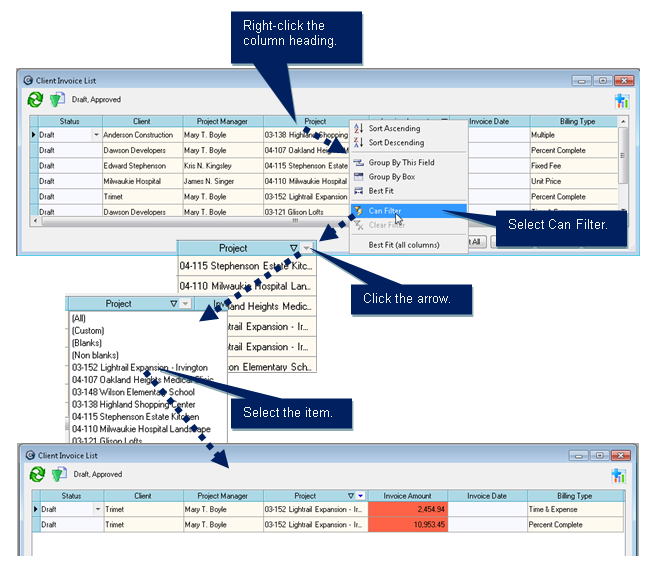
To see all the invoices again, you would right-click the column heading and click Clear Filter.
This type of change remains in effect only until you close the window.
View only items with a particular status
For example, you may want to see only active employee types.
In ![]() > task
> task![]() and make a selection.
and make a selection.
| Note: | If there
is no status column, either it does not apply, or it is an additional
column you can add using (Customize). |

This type of change remains in effect only until you close the window.
Resize columns
It's easy to resize columns in a ![]() > task
> task
| To | Do this |
|---|---|
|
Resize a column |
Click and drag the right boundary on the column heading until the column is the width you want. |
|
Resize a column to fit the widest row |
Right-click the column heading, and click Best Fit. |
|
Resize all columns to fit the widest rows |
Right-click any column heading, and click Best Fit (all columns). The new column widths are permanent and can be changed only using Best Fit (all columns) option. |
| Note: | The effects of the Best Fit and Best Fit (all columns) options are permanent until you use the option again. When you resize a column by dragging a border, the change remains only until you close the window. |
Grouping like entries together
There are times when you may want to see information in a ![]() > task
> task
Here's how you do it:
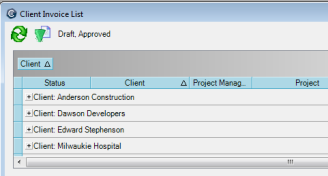
- Right-click the column heading, and click Group by this field.
In this example, on the Client Invoice List window, after right-clicking the Client column and clicking Group by this field, the list is grouped by client:
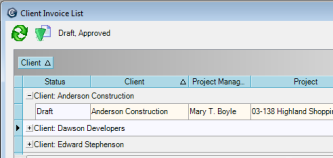
Here is the list after you click the plus  sign to expand the client information:
To return to the standard view, right-click the column heading and click Ungroup.