Preview Window Options
When you preview a report, use the toolbar at the top of the Preview window to perform actions such as navigating within the report or printing the report.
| Field | Description |
|---|---|
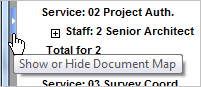
| Show or Hide Document Map | Click the bar on the left edge of the Preview window to display the document map. Use the document map to locate and jump to a specific section of the report.
Click the similar bar on the right edge of the document map pane to hide the document map. The document map is an outline of the structure of the report, based on the sorting and grouping criteria you set up for the report. The document map contains a link for each sorting and grouping value. When you click a link in the map, Vision displays that portion of the report in the Preview window. For example, if you sort and group data on a report by project number and phase number, the document map contains a link for each project number at the top level of the map hierarchy and a link for each phase within each project at the next level of the hierarchy. The document map is not available when you display the report in print layout mode. |
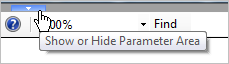
| Show or Hide Parameter Area | Click the bar on the top edge of the Preview window toolbar to display the parameter area. In the parameter area, you can change selected report parameters and click
View Report to generate the report again without returning to the Options dialog box.
Click the similar bar at the bottom edge of the parameter area to hide the parameter area. This option is not available for all reports. |
|
|
Click this option to display the first page of the report. |
|
|
Click this option to display the previous page of the report. |
| ___ of ___ | This option displays the current page number and the total number of pages in the report (for example,
27 of 50).
To display a specific page of the report, enter the page number and press Enter. |
|
|
Click this option to display the next page of the report. |
|
|
Click this option to display the last page of the report. |
|
|
If Vision is generating a report and you want to stop that process rather than wait for Vision to display the report, click this option. |
|
|
Click this option to regenerate the report with the current data in the database. |
|
|
Click this option to display the Print dialog box and then select a printer and set other printing options. |
|
|
Click this option to display the report as it would look if you printed it. If you click
In print layout mode, you cannot do the following:
Click
|
|
|
Click this option to display the Page Setup dialog box. On that dialog box, you can complete the following actions:
|
|
|
To send the report as an email attachment or to send a link to the report in an email message, click this option. On the Email Report dialog box, specify the recipients, subject, message text, and file format. |
|
|
To save the report to a file, click this option to display the Download dialog box. In that dialog box, select the file format and indicate if you want to include all report pages or only a range of pages.
You can save reports in any of the following formats:
To open the report file after Vision generates it, click Open in the Download dialog box. Vision opens the file in the application that is associated with the file type in Microsoft Windows. (You can review or change those associations in Windows Control Panel. Open the Control Panel window, double-click File Options, and click the File Types tab.) When you click Open, Vision also saves the report file on your computer in the Documents and Settings\<windows user>\Local Settings\Temp folder. To save the report file after Vision generates it, click Savein the Download dialog box and specify the file name and location. To open the saved file, double-click it in Windows Explorer. |
|
|
Click this option to search the report displayed in the Preview window, based on the fields and search values you specify. You can then view the search results on the computer, print them, or export them to Microsoft Excel.
The advanced search feature is not available if you use SQL Server Express or SQL Server Workgroup. |
|
|
Click this option to display a help topic that describes how to use the Preview window. |
|
|
To zoom in (enlarge the report data) or zoom out (shrink the report data), select one of the following from the drop-down list:
|
| Find | To do a simple search for text in the report, enter that text in
Find and click
The search feature has the following characteristics:
|
|
|
Click this option to display the first occurrence of the text in
Find. To find other occurrences, click
This option is not available in print layout mode. |
|
|
After you click
This option is not available in print layout mode. |
 Get Report Information Get Report Information
|
Click this option to view the following information for the report:
|