Insert Merge Codes for Multiple Records in an Adobe InDesign Merge Template
There are merge codes that allow you to insert multiple records on one page or without page breaks when generating a proposal.
To insert multiple records in an InDesign merge template:
-
When you create or update an InDesign merge template in
Vision, on the Merge Code dialog box in
Vision, click the Insert Record Begin/End Codes button.
This inserts [Begin Record] and [End Record] codes on the template, which allow you to add multiple records on one page or without page breaks when generating a proposal. The ability to add multiple records to a proposal is useful when creating project sheets with multiple projects on one page, or client reference sheets with multiple clients on one page.
If you need more instructions on how to create a merge template and open the Merge Code dialog box, see the "Create a Vision Merge Template with Adobe InDesign" help topic or the "Update an Adobe InDesign Merge Template in Vision" topic.
-
Insert all table and field merge codes between the [Begin Record] and [End Record] codes. All of the codes, text, graphics, and objects that are between these codes will then repeat for each record that uses the template and is merged into the proposal. Repeat as needed.
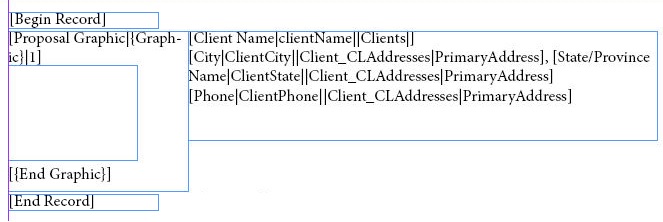
For example, if you enter the following codes in InDesign:
And have the following two records on the Project tab of :

When you generate the proposal, the two records will be listed on the same page follows:

It is important to note that multiple records may exceed the space allotted in an InDesign text frame on one page. To avoid issues with overset, it is helpful to thread, or link, the text frames together before you generate the proposal. Before you add merge codes it is helpful to create additional blank pages in InDesign and use the thread option to thread the text boxes together. When you generate the proposal, the text will flow from page to page as needed.