Use these fields and buttons when you create or view purchase orders.
Above the Grid
| Field | Description |
|---|

|
Click to return to the Find Purchase Orders page.
|
| PO Number
|
This field displays the system-generated purchase order number.
|
| PO Name
|
Enter the purchase order name. It is a mandatory field, and you cannot save the screen until you have entered at least three characters.
|
| Description
|
Enter a description for the purchase order.
|
| Supplier Name
|
Select a supplier.
|
| Supplier Address
|
Select the supplier address.
|
| Supplier Phone
|
Enter the supplier contact number.
|
| Supplier Contact
|
Select the name of the supplier contact.
|
| Supplier Ref
|
Enter a supplier reference, if applicable.
|
| PI Number
|
Enter the purchase invoice number.
|
| PI Date
|
Select the purchase invoice date.
|
| PI Paid
|
Select the date when the purchase invoice was paid.
|
| Amount Paid
|
Enter the amount that was paid toward the purchase invoice.
|
| Order Status
|
Select an order status, for example,
Not Ordered. This field is updated automatically after a PO is issued; however, you can update it manually if the PO output is not required. Order status is also visible from the Job page.
|
| User Status
|
Select a user status, for example,
Invoice Not Arrived.
|
| Approval Status
|
Select an approval status, for example,
Submitted.
|
| Owner
|
Select the purchase order owner.
|

|
Click to import purchase items from one or more jobs to the purchase order.
|
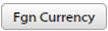
|
Click to select an alternate currency. When you click the button, additional options are displayed:
- Classic displays only the base currency columns.
- Lite displays only the foreign currency columns and hides the base currency columns.
- Advanced displays both the base currency and foreign currency columns.
Select the currency that you want to use and get the exchange rate. The system pulls the most recent rate for you or you can manually enter a rate.
Click one of these buttons again to return to the previous view.
|

|
Use these buttons to hide or display the estimate, ordered, and actuals columns in the grid.
|
Grid
The columns that are displayed depend on your column selection settings, which of the
Estimates/Ordered/Actuals buttons are selected, and whether you have selected the
Fgn Currency button.
| Field | Description |
|---|

|
Click to display the Column Selector Profiles pop-up and select the columns that you want to display in the view.
|
| Job #
|
This column displays the job numbers that are linked to the purchase order. Click the link to view the Jobs page.
|
| Tender #
|
This column displays the tender number, if one has been entered.
|
| Purchase Description
|
This column displays a description of the purchase.
|
| Purchase Note
|
Any purchase note entered against the purchase line in the quote or job is displayed as read-only text here.
|
| Charge Band
|
This column displays the related charge band.
|
| Spec
|
Enter any supplier specifications. This information is displayed on the PO output.
|
Estimates Grid Columns
These values are pulled from the quote or job and can only be updated in the quote or job. They are not visible on the PO output document.
| Field | Description |
|---|
| Qty
|
This column displays the number of items being purchased.
|
| Unit Cost
|
This column displays the cost per unit.
|
| Total Cost
|
This column displays the total cost, that is, the cost per unit x the number of items being purchased.
|
| Markup %
|
This column displays the markup percentage.
|
| Total Cost Incl Markup
|
This column displays the total cost including the markup percentage.
|

|
Use the arrow to copy data from the Estimates columns to the Ordered columns.
|
Ordered Grid Columns
You can change these values to reflect the cost of what you are ordering. They are not visible on the PO output document.
| Field | Description |
|---|
| Qty
|
Use this column to edit the number of items being purchased.
|
| Unit Cost
|
Use this column to edit the unit cost.
|
| Total Cost
|
This column displays the total cost, that is, the cost per unit x the number of items being purchased.
|
| Total Cost Incl Markup
|
This column displays the total cost including the markup percentage.
|
| Due Date
|
Specify a due date. This is displayed in job reports and on the output.
|
|
|
Use the arrow to copy data from the Ordered columns to the Actuals columns.
|
Actuals Grid Columns
These values should only be provided when you know the price that is actually being paid for the purchase. These values are typically added after the supplier invoice has arrived.
| Field | Description |
|---|
| Qty
|
Use this column to edit the number of items that were purchased.
|
| Unit Cost
|
Use this column to edit the unit cost based on actual figures.
|
| Total Cost
|
This column displays the total cost, that is, the cost per unit x the number of items being purchased.
|
| Delivered Date
|
Enter the purchase invoice delivery date. After all purchases have been delivered, the
Order Status should be updated to
Delivered.
|
| Tax 1
|
Enter any relevant tax codes.
|
| Tax 1 Amt
|
This column displays the tax amount based on the tax code entered in Tax 1.
|
| Total Cost Incl. Tax
|
This column displays the total cost including tax.
|
| PI Reference
|
Enter a purchase invoice reference that related to the purchase order line, if applicable.
|

|
Click to delete the line from the purchase order. If this option is not available, you might not have permission to delete the line; contact your TrafficLIVE administrator.
|
Below the Grid
| Field | Description |
|---|

|
Click to create a purchase order.
|
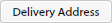
|
Click to enter or select the delivery address. You can select one of the following options:
- The
Client Address displays a list of clients associated with the PO.
- The
Company Location Address is from the
.
- Select
Custom Address to enter an address where you want the purchase order to be sent.
|

|
Click to view the PO output before you issue it. Clicking this button outputs a document that does not show the PO number. You can view the draft order as many times as you need to.
|

|
Click to create the PO, including the PO number, and send the output to the supplier.
|
|
Click, then choose
Delete PO to delete the purchase order.
|

|
Click to cancel any changes that you have made to the page.
|

|
Click to save your changes.
|