The left pane of this page is divided into tabs to display different types of information. The right side of the page displays information in a calendar grid format.
Top of Page
The tabs in the left pane of the My Calendar page display information about tasks, milestones, and booked time and allow you to search for tasks. The right side of the page presents information in a calendar grid format.
- Use the
Allocated Tasks tab to view, edit, and enter information about work that is allocated to you (depending on your permissions).
- Use the
Task Search tab to find information about all open tasks in your TrafficLIVE system.
- Use the
All Tasks tab to view information about all open tasks in your TrafficLIVE system.
- Use the
Milestones tab to view information about project milestones.
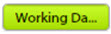
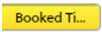
- Use the
Booked Time tab to create or reschedule bookings.
- Use the calendar grid on the right side of the page to view and change (when permissions allow) allocations and booked time and to record time that you have worked.
| Field | Description |
|---|
| Time Sheet Search
|
Click to access the My Time Sheet Search page.
|
| Employee Name Drop-Down
|
Choose the name of an employee whose calendar you want to view. The default value is your name.
When you are viewing another person's calendar, the
My Calendar button appears next to the drop-down so that you can click it to switch back to your calendar.
When you are viewing another person's calendar, you cannot add time sheets or move allocations.
If your company has the TrafficLIVE Enterprise plan, you might see entries for roles in this drop-down. For example, you might see
(*) Designer. During the process of setting up a job and pricing tasks, the job owner can request a resource by role if an actual employee in that role has not yet been selected. The resource manager then moves the generic role to a specific employee.
|
Refresh

|
Click to refresh the current view.
|
Above the Calendar Grid
| Field | Description |
|---|

|
Click - to decrease the size of calendar entry spaces. Click + to increase the size.
|

|
Click to display today's schedule.
|

|
Set the display format by clicking these buttons as follows:
- Day — Displays one day.
- W1 — Displays the full time period for all days in one work week.
- W2 — Displays the full time period for all days in two work weeks.
- W3 — Displays the full time period for all days for three work weeks.
- W4 — Displays the full time period for all days for four work weeks.
- < and
> — Move between days or weeks, depending on whether the grid is displaying days or weeks.
|
Date Field and

|
Enter a date or click the calendar icon to select a date.
|

|
Click to control how you can move intervals that are part of the same task. If this button is enabled, you can move multiple intervals that belong to one task as a group. Otherwise, you must move individual parts of the task independently.
|
|
Click to display or hide non-working days, such as weekends or holidays.
|

|
Click to display or hide scheduled work. This can make it easier to see other information more clearly if the calendar is busy.
|

|
Click to display or hide time sheets. This can make it easier to see other information more clearly if the calendar is busy.
|
|
Click to display or hide appointments that are not related to a job. This can make it easier to see other information more clearly if the calendar is busy.
|
Below the Calendar Grid
| Field | Description |
|---|
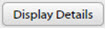
|
Click to display detailed information about a selected entry in the Task Information sub-tab below the Allocated Tasks tab.
|

|
Click to divide one allocation into two smaller allocations. If an allocation is surrounded by a red ring, you cannot split it; the red ring indicates that splitting the allocation would breach the deadline of the task. The ability to split allocations is controlled by permissions.
|
|
Choose Submit All from this pull-up to submit all time that you have recorded on your tasks.
|

|
Click to synchronize your calendar with your Google calendar, Exchange calendar, or Exchange 365 calendar. You can only use this button if you have enabled synchronization.
|

|
Click to cancel all actions since the last time that you saved.
|

|
Click to save entries and changes.
|