A Menu Tree determines which events are available to an employee posting time and to the employee’s supervisor when modifying the employee’s timecard. A Menu Tree is assigned to an employee via the Web Terminal Menu setting.
The event’s in a person’s Web Terminal Menu will be restricted based the person’s Event Filtration setting and any posting restrictions the event has.
A Menu Tree (the Web Terminal Menu setting) can be assigned at the System level, to an Employee Group, or to an Employee. Menu Trees are also assigned to Terminal Profiles (in the Menu Group Name field). The Web Terminal Menu setting will override the Terminal Profile’s Menu Group for the Web Self Service Time Card, Web Time Clock, Mobile Client, and Mobile Web Application.
A Menu Tree can also be assigned to a supervisor using the Web Terminal Manager Menu setting. The events in this menu will only display to the supervisor (in the Supervisor Review timecards).
You cannot modify or delete the system default Menu Tree (TERMINAL_DEFAULT). However, you can copy the TERMINAL_DEFAULT Menu Tree and modify the duplicate as necessary.
When you finish modifying a Menu Tree, click Update Server to update all active terminals with your changes.
See Also:
Rearrange the Events in a Menu Tree
Delete an Event from a Menu Tree
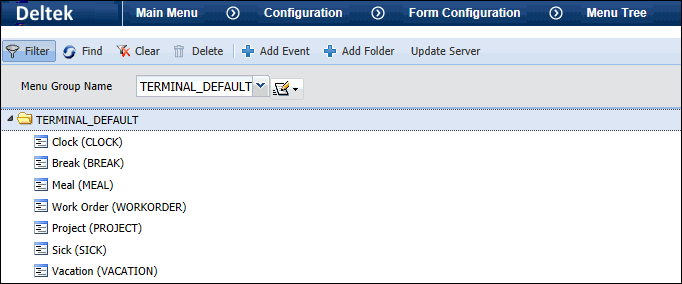
Click Main Menu > Configuration > Form Configuration > Menu Tree.
Select a Menu Group Name.
The Menu Group’s folder will display.
Click the arrow on the left side of the folder to expand it and view the events and folders in the menu.

Click Main Menu > Configuration > Form Configuration > Menu Tree.
Select a Menu Group from the Menu Group Name field.
Do not select the TERMINAL_DEFAULT Menu Group (you cannot modify the TERMINAL_DEFAULT Menu Group).
If you need to create a new Menu Group, click the
![]() button next to the Menu
Group Name field and select Add
from the pop-up menu.
button next to the Menu
Group Name field and select Add
from the pop-up menu.
Select Maintain if you want to duplicate an existing Menu Group and add events to it.
Select Lookup to display the available Menu Groups in a pop-up form.
Once you select your Menu Group, the Menu Group’s folder will display.
Click the arrow on the left side of the folder to expand it and view the events and folders in the menu.
Select a folder and click Add Event.
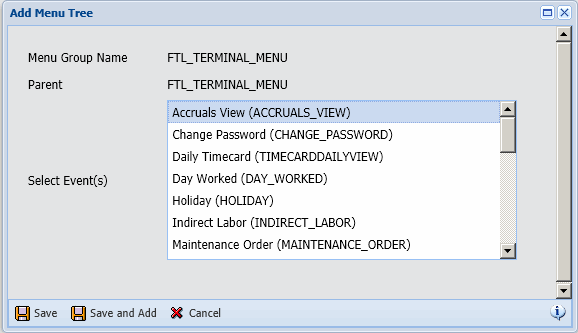
On the Add Menu Tree pop-up form, select the events you want to add. To select multiple events, press the CTRL key as you select them.

To keep the Add Menu Tree window open and continue adding events, click Save and Add. Or, click Save to save your selected events and return to the Menu Tree form.
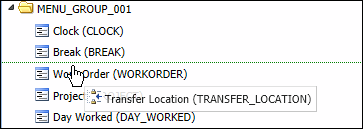
You can drag and drop the events in a Menu Tree to move them to a new location.


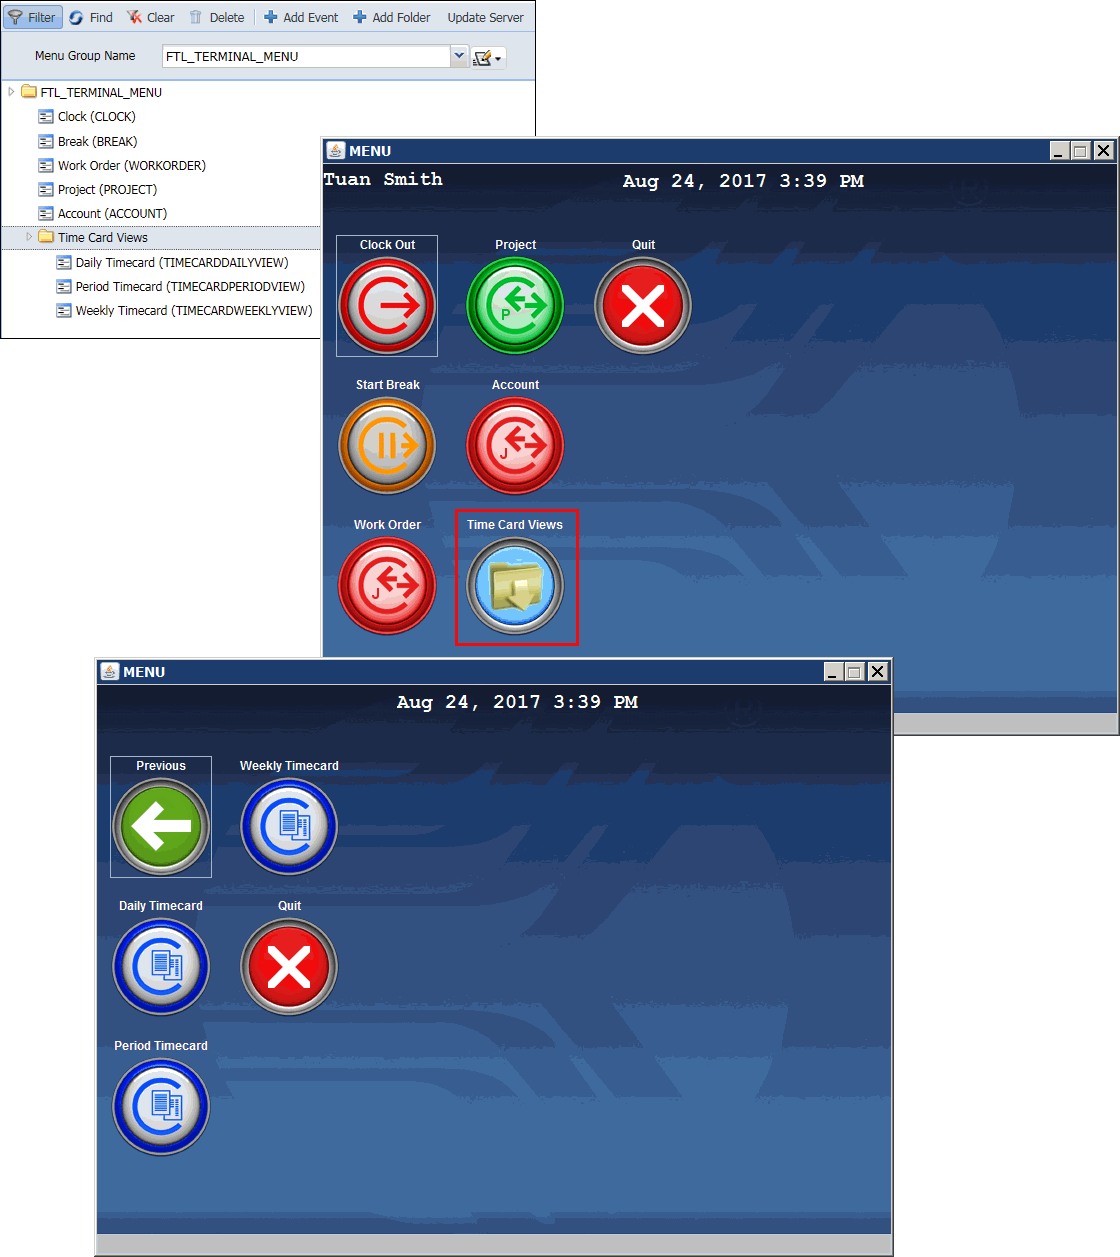
You can use folders to group events that display on a terminal.
Click Main Menu > Configuration > Form Configuration > Menu Tree.
Select a Menu Group from the Menu Group Name field.
Do not select the TERMINAL_DEFAULT Menu Group (you cannot modify the TERMINAL_DEFAULT Menu Group).
If you need to create a new Menu Group, click the
![]() button next to the Menu
Group Name field and select Add
from the pop-up menu.
button next to the Menu
Group Name field and select Add
from the pop-up menu.
Select Maintain if you want to duplicate an existing Menu Group and add events to it.
Select Lookup to display the available Menu Groups in a pop-up form.
Once you select your Menu Group, the Menu Group’s folder will display.
Click the arrow on the left side of the folder to expand it and view the events and folders in the menu.
Select the folder to which you want to add the new folder. For example, to add a folder to the main menu, select the Menu Group’s folder. To add a folder inside another folder, select the folder one level above.
Click Add Folder.
On the Add Menu Tree pop-up form, enter the Folder Name. The Folder Label is optional. If you enter both values, the Folder Label will display in the terminal menu.
To keep the Add Menu Tree window open and continue adding folders, click Save and Add. Or, click Save to save your folder and return to the Menu Tree form.

Click Main Menu > Configuration > Form Configuration > Menu Tree.
Select a Menu Group Name.
Do not select the TERMINAL_DEFAULT Menu Group (you cannot delete events from the TERMINAL_DEFAULT Menu Group).
To display the available Menu Groups in a pop-up
form, click the ![]() button
next to the Menu Group Name field and select Lookup
from the pop-up menu.
button
next to the Menu Group Name field and select Lookup
from the pop-up menu.
Once you select your Menu Group, the Menu Group’s folder will display.
Click the arrow on the left side of the folder to expand it and view the events and folders in the menu.
Select the event you want to delete and click Delete.
Click OK to confirm the action.
The Update Server button will update all active terminals with the latest Menu Tree changes. The terminals will then display the latest terminal menu changes the next time a user logs in.
Click Main Menu > Configuration > Form Configuration > Menu Tree.
Update your terminal Menu Trees as necessary.
Press the Update Server button.
Click OK to confirm the action.
All active terminals will be updated with the latest Menu Tree configurations.