Exporting Cognos Content
Use this procedure to export your Cognos content.
To export your Cognos content:
- Log on to your existing CER portal with an administrator account.
-
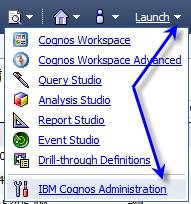
Access the
Administration area using any of the following methods:
-
At the Welcome screen, click Administer IBM Cognos content.

-
If you prefer to go straight to the Cognos Connection area, click .
-
-
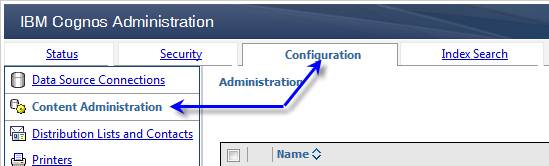
Click the Configuration tab, and click
Content Administration.
-
Click the
New Export icon in the toolbar

- Name it “<your company name> Transfer to Deltek,” and click Next.
-
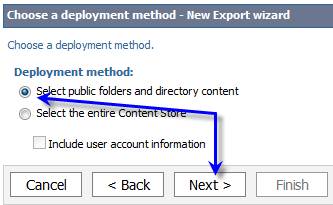
For
Deployment method, select
Select public folders and directory content, and click
Next.
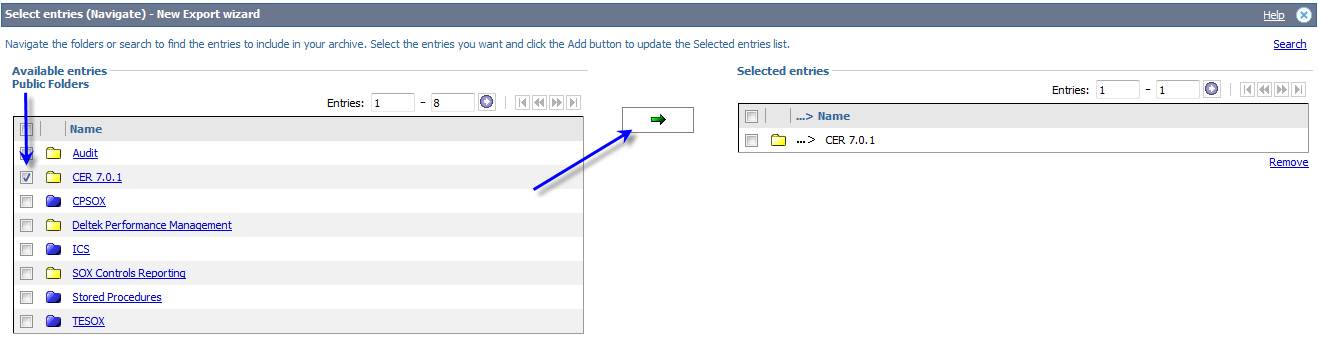
- In the Public Folders section, click Add.
-
Select the check boxes next to the folders that you want to migrate, click the green arrow to move the folders to the
Selected entries section, and click
OK.
-
Select the
Report Output versions that you want to transfer for the
Include run history and
Include schedules options, and click
Next.

Deltek recommends that you include only the schedules. Including output versions could result in extremely large files to transfer.
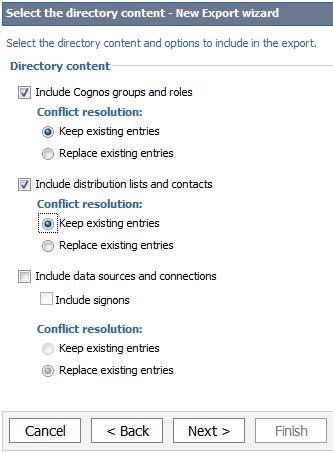
-
Select the
Directory content options as follows, and click
Next.
Please DO NOT include data source connections as they will not work in the cloud and will be re-established as part of the Cognos implementation.
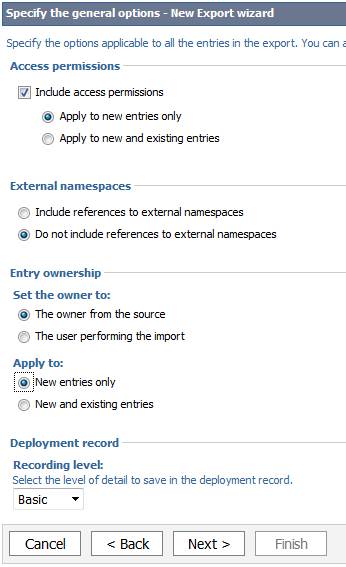
-
Select the
General Options as follows, and click
Next.
-
Leave
New archive selected with the name specified, and encrypt the content of the archive, and click
Next.
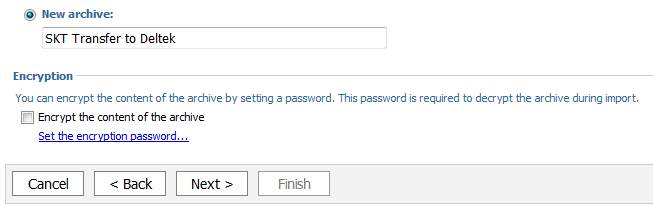
You can also choose to not encrypt since you are transferring this over SFTP, so it will be secure during the transfer. If you choose to encrypt, you will need to provide Deltek with the password you used.
- Verify that your selections are correct, and click Next.
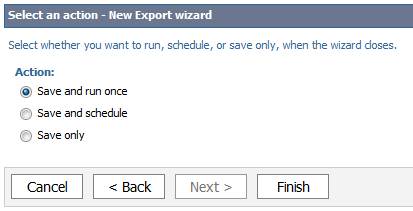
-
Select
Save and run once, and click
Finish.
-
Select
Now, and click
Run.

-
Select the
View the details check box, and click
OK to confirm that the report was successfully exported.
If you choose not to view the details, wait 15 or 20 minutes before moving on to the Gather Files to Migrate section.

-
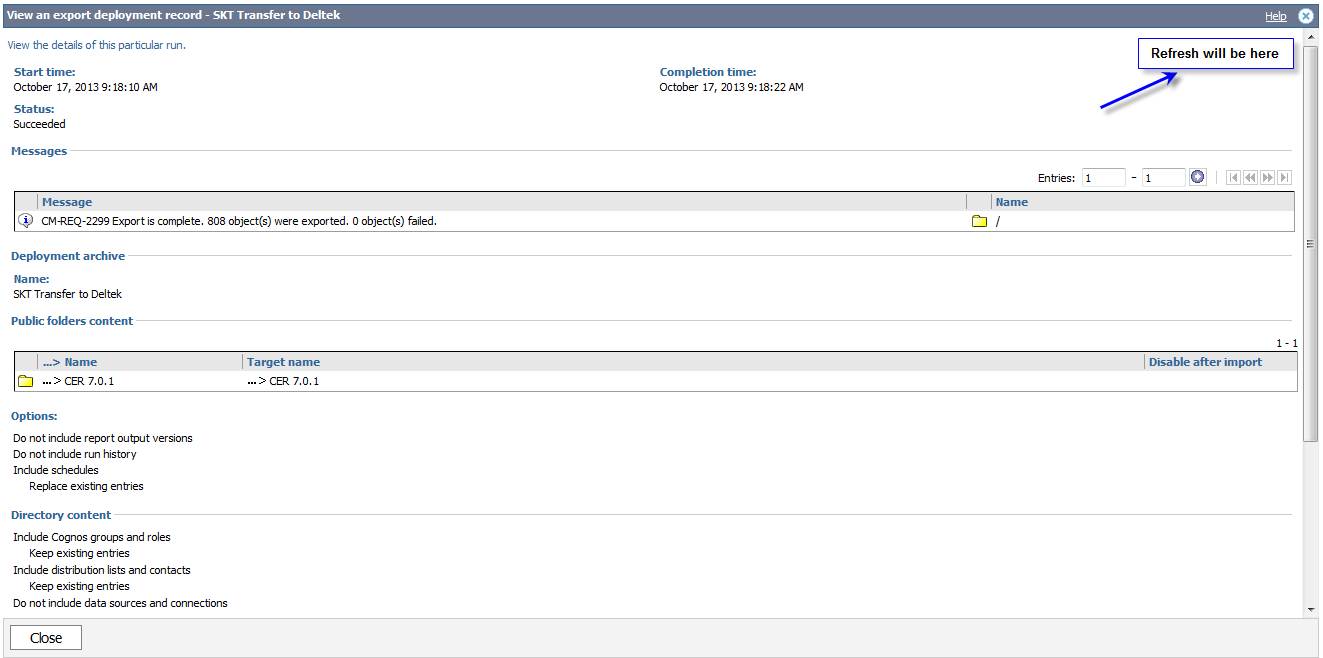
If you chose to view the details, there is a
Refresh link that you can click from time to time to check the status.
Click Refresh until you see a results screen similar to the screen shot below. DO NOT use the browser refresh button or the portal refresh button located beside the Log Off link in the toolbar.
- When complete, click Close.