Wide Area Workflow (WAWF) is a secure web-based system set up by the Department of Defense (DoD) for electronic invoicing, receipt, and acceptance. You can electronically submit invoices and government inspection and acceptance documents. Using web-based applications, government contractors and authorized DoD personnel can generate, capture, and process receipt and payment-related documentation. Authorized DoD users are notified of pending actions by email and are presented with a collection of documents required to process the contracting or financial action. The system uses Public Key Infrastructure (PKI) to electronically bind the digital signature to provide non-refutable proof that the user has electronically signed the document. More importantly, WAWF helps to mitigate interest penalty payments caused by lost or misplaced documents. The WAWF website is https:\\wawf.eb.mil.
You can submit invoices to the WAWF using one of three different methods:
You can enter your invoices into the WAWF system, one at a time, by accessing the WAWF website and completing each interface screen. This method is currently available to any contractor that has been set up and approved for the WAWF.
You can create a batch file, which can contain multiple invoices that can be uploaded into the system. One type of batch file is Electronic Data Interchange (EDI), which requires you to acquire translation software to match the batch file to a transaction set. Because of the cost and complexity of EDI, many companies do not use the EDI method unless they are already set up for it. Additionally, the WAWF has noted that the overwhelming majority of the batch files they receive are not EDI. For this reason, Costpoint does not currently include the ability to generate EDI batch files for the WAWF.
Another batch file method is File Transfer Protocol (FTP), which involves creating a flat file that you can transfer via FTP to the WAWF. Because of its relative simplicity, this is the method Costpoint uses to create WAWF files.
Costpoint's role is to create the batch files that can be uploaded to the WAWF. There is a deployment process, outlined in government websites, which is required of contractors who plan to use the WAWF. It is the responsibility of users to understand this process, as well as the WAWF system in general.
Billing data is retrieved from three different general sources: Standard Bills, Progress Payment Bills, and Project Product Bills. You can select the source on an individual project basis. Regardless of the source of the files, however, you can retrieve only data that is currently available in the billing tables. If the data is not available, you can enter the information in the Maintain Project WAWF Information screen so that it appears in the file.
Here is how you will typically use the Costpoint's WAWF feature:
We have added a new WAWF Options group box to the Billing Settings screen. Use it to specify a default output path for the Create WAWF Billing Files screen (Projects » Billing » Print Billings). This will provide guidance to your users and assist them in ensuring that their output files are directed to the proper location.
Select the Enable Project Product Bills for WAWF check box to enable the WAWF Info, ACRNs, and MILSTRIPs subtasks in the Edit Project Product Bills screen (Projects » Billing » Edit Billings). In addition, the Line Item Type will become visible in the table window of the main screen.
In this screen, set up all the valid CAGE codes for your company. A company can have more than one CAGE code. You must also enter the Department of Defense Activity Address Codes (DoDAAC) specified in your contract. These become the defaults assigned to the CAGE Code, but you can change them in the Maintain Project WAWF Information screen when you assign the CAGE Code to a project. You can enter extensions, but they are not required.
Set up this screen at the billing level of the project for which you would like to create a WAWF FTP file. You also need to assign a CAGE Code to this project. You can assign only one CAGE code to an invoice-level project. The DoDAACs you assigned to the CAGE code in the Maintain WAWF Billing Settings screen will default in to the DODAACs group box at the bottom of the screen, but you can change them. You also have the following three options:
Include Discounts and Taxes in CLIN – This check box defaults as checked. If you leave this check box selected, the taxes and discounts follow the billed amounts as mapped to the CLIN. If the CLIN Mapping Method is Use ACRN Mapping, this check box is selected and is not editable.
Map Units by Account – This option defaults as selected. If you leave this option selected, the unit transaction account is used in the mapping. This method treats units as any other billable cost. If you select this option and the Combo invoice type, the UID or RFID information (lines 16D – 16F) is not used in the Combo file. If the CLIN Mapping Method is Default CLIN, this option is not available.
Combine Units by Transaction CLIN – Select this option to have unit transactions mapped by the CLIN/catalog used when the units were entered. If the CLIN Mapping Method is Use ACRN Mapping, you must map the unit transaction CLIN or catalog in the Maintain ACRN Bills screen (Projects » Billing » Billing Master) as a line item to be included in the WAWF file. If the CLIN Mapping Method is CLIN Mapping, the transaction CLIN or catalog does not need to be mapped to be included in the WAWF file. However if the CLIN is in specified and other billed costs are also mapped to that CLIN, they are summed together and the unit price derives as the total billed amount divided by the quantity of units billed. If you use this method, if the CLIN and item in the UID subtask matches the billed units, and the invoice type is Combo, the UID and RFID information is used in the WAWF file (16D – 16F). If the CLIN Mapping Method is Default CLIN, this option is not available.
Next, you need to specify a CLIN mapping method:
Use the fields in this group box to select the CLIN mapping method for this record.
If you select the Use ACRN Mapping option, you must first set up the Maintain ACRN Bills screen. If you select this option, Costpoint uses the mapping set up in the Maintain ACRN Bills screen when creating the WAWF file. All fees and burdens and possibly taxes and discounts (if selected) follow the billed amounts with which they are associated. Since WAWF files are built using line items, the only valid ACRN mapping methods are ACRN/Line Item and ACRN/Line Item with Mapping.
If you select the Default CLIN option, enter a CLIN ID in the field to the right of the option. The Create WAWF Billing Files screen (Projects » Billing » Print Billings) uses this CLIN when creating the FTP file.
If you select the CLIN Mapping option, use the CLIN Mapping subtask and its subtasks to map projects and, optionally, accounts or labor categories. If you have specific project account groups or have established their transaction projects so that they relate to ACRNs or CLINs (line items), no account or PLC mapping is necessary. For example:
|
Project Number |
Project Function |
Line Item (CLIN) |
|
C001 |
Top Level Rollup |
|
|
C001.01 |
Revenue and Billing Level |
|
|
C001.01.01 |
Task 1 Engineering Labor |
0001AA |
|
C001.01.02 |
Task 2 Support Labor |
0002AB |
|
C001.01.03 |
Task 3 Other Direct Costs |
0001AA |
You have line items associated with the project tasks, so there is no need to map accounts or PLCs. You can map the transaction level project as shown above.
If the line items cannot easily be associated with project numbers, you can map accounts or Project Labor Categories (PLCs) to each line using the Accounts or CLIN Mapping subtasks.
You also need to specify what type of invoice you want to generate. The valid invoice types are Cost Voucher, Commercial Invoice, 2N1, Combo, and Progress Payment. The system generates a different FTP file for each invoice type. Each must be submitted separately.
After you determine what type of invoice you want to generate, you need to specify what source the Create WAWF Billing Files application should use to retrieve the data for this invoice project. The available file sources are Standard Bills, Progress Payment Bills, or Project Product Bills.
Use the appropriate subtasks to enter additional information for each invoice type. This information is required for the generation of the FTP file but is not available in the billing edit tables.
Cost Voucher subtask - You can enter a task order to be included in the file, but it is not required. Select the Final Invoice check box if the next invoice generated for this project will be the final invoice.
If an attachment needs to be submitted with the file, enter the file path and file name. The file path will not be submitted in the file but will be stored here to help you locate the file that was submitted.
Commercial Invoice subtask - Indicate whether the next invoice that will be generated will be the final invoice and/or final shipment. If the invoice will be the final shipment and you are using the MOCAS pay system, the bill number must be formatted as indicated in the "WAWF layouts FTP – MOCAS.xls" spreadsheet, available from Deltek's e-Support site (this information is also included in the documentation for the Create WAWF Billing Files screen). The attachment file works the same as for the Cost Voucher.
2N1 subtask - Indicate whether the next invoice that will be generated will be the final invoice and/or final shipment. If the invoice will be the final shipment and you are using the MOCAS pay system, the bill number must be formatted as indicated in the "WAWF layouts FTP – MOCAS.xls" spreadsheet, available from Deltek's e-Support site (this information is also included in the documentation for the Create WAWF Billing Files screen). The attachment file works the same as for the Cost Voucher.
Combo subtask - This subtask contains several fields that are needed in the generated Combo file that are not in the Billing Edit tables. It also contains options for fast pay invoices.
UID Information subtask - This subtask is available only for Combo invoice types. CLINs and items entered in the UID Information subtask must match CLINS and items that are being billed. If they do not, they will not be included in the file. The UID Type drop-down list includes the seven UID types that are acceptable. The IAC (Issuing Agency Code) is required if the UID Type is UID1 or UID2.
If you select a line in the first table window and shift the focus to the second table window, you can add lines for the Unique Identifier and UID Serial No. There can be a many-to-one relationship between the lines in the first table window and the lines in the second table window. If an item has UIDs, the number of UIDs entered must match the item quantity in the WAWF file.
RFID Information subtask - The RFID information is used to track shipped items. When you enter lines in this table window, the Tag Type will default to RFID but can be changed. The tag ID must be 16, 24, 32, or 64 characters in length, and you can use only numerals 0-9 and letters A-F. You cannot use spaces or special characters.
Progress Payment subtask - This subtask is available only for Progress Payment invoice types.
If advanced payments against this contract have been received or items have been delivered, invoiced, and accepted, select the Delivery on Invoice check box. If this check box is selected, you must have amounts in line 20a and 25 on the progress payment invoice from which a WAWF file will be generated.
The Date of Financial Info is required in the WAWF file. The request number must begin with "PPRB" if the FMS check box is selected. Otherwise the request number must begin with PPRA. If the request number is eight characters long, the eighth character must be a letter to designate a LOT contract. For this reason, the program cannot extrapolate a previous bill number.
For a project to be included in an FTP file, there must be data in the billing edit tables and the bill must have a status of Selected. Also, the Included in WAWF File check box must be cleared. This ensures that the project is not included in more than one FTP file. If you make any edits to over ceiling or retainage amounts and a record exists in the Maintain ACRN Bills screen or the Maintain Project WAWF Information screen, a message displays indicating the changes will not be included in the ACRN allocation or WAWF file. In this case, you must edit the ACRN allocation amount in the Maintain ACRN Bills screen (Projects » Billing » Billing Master) and the WAWF file.
Use this screen to generate an FTP file for one invoice type at a time. The application will reference the Maintain Project WAWF Information screen (Projects » Project Setup » Project Master) to determine which projects are assigned the invoice type selected. The program will also look at the File Source selection (Standard Bills, Progress Payment Bills, or Project Product Bills) in that screen to determine which billing edit tables to use to retrieve the invoice information.
If, after generating an FTP file, you find that it has a project you do not want to include, you should deselect the project bill and rerun the process. You can select the Clear WAWF File Flags check box and rerun the Create WAWF Billing Files screen for the project selection. This will allow you to recreate the file to include all selected invoices, even if they were created in a prior process.
Because the files submitted to the WAWF system effectively replace hard copies of the invoices, Create WAWF Billing Files follows the same logic as printing the bills. The same selection criteria found in the Post Standard Bills screen (Projects » Billing » Post Billings) can be found in the Create WAWF Billing Files screen.
In order to be included in a batch file, the bill must fall within the parameters on the processing screen for:
Project
Billing Cycle
Bill Group
Project Manager
Invoice
The Invoice Type of the project record in the Maintain Project WAWF Information screen (PROJ_WAWF_INFO.wawf_invc_type_cd) must match the Invoice Type selected on the processing screen.
The bill must have a Select status (S), indicating that it has been approved.
The Included in WAWF File check box must be blank (N) in the appropriate bill edit header in order for the bill to be included in the file:
Standard Bills: BILL_EDIT_INVC_HDR.xfr_wawf_fl
Progress Payment Bills: PRG_PMT_EDIT_HDR.xfr_wawf_fl
Project Product Bills: PROJ_PROD_INVC_HDR.xfr_wawf_fl
Refer to the following spreadsheets, available from Deltek's e-Support site, to see how the file is built and where the information is pulled from. This information is also available in the documentation for the Create WAWF Billing Files screen (see the "FTP File Layouts" section).
WAWF FTP Layouts Other – Standard Bill.xls
WAWF FTP Layouts MOCAS – Standard Bill.xls
WAWF FTP Layouts Other – Project Product Bill.xls
WAWF FTP Layouts MOCAS – Project Product Bill.xls
WAWF FTP Layouts – Progress Payment Bill.xls
Other Standard Bills Attachment.xls
MOCAS Attachment.xls
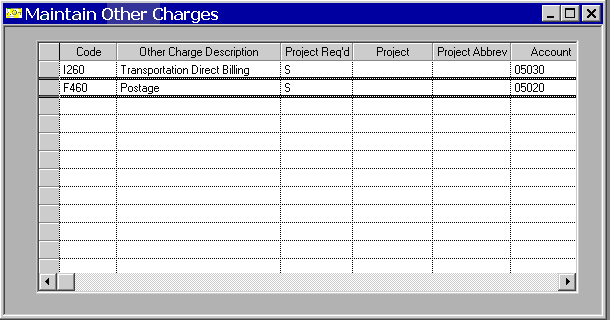
If you are billing other charges, you need to enter an acceptable fee/charge in the Code column of the Maintain Other Charges screen (Projects » Billing » Controls). See the WAWF Interface Control Document (ICD) for details. Once you have set up the other charge here, enter the other charge in the Totals subtask of Edit Standard Bills screen (Projects » Billing » Edit Billings) after you calculate the standard bill or in the Other Charges subtask of Edit Project Product Bills screen (Projects » Billing » Edit Billings). This code will generate in the WAWF file as a line item type 2, and the line item will be the code entered.
You have the option of using a manual-type bill (Project Product Bills) as the source for the WAWF files. Using this type of bill provides more flexibility than Standard Bills because you can manually enter the information that appears in the files.
The following column is available only if the Enable Project Product Bills for WAWF check box is selected in the Billing Settings screen (Projects » Billing » Controls): Line Item Type.
In addition to the five columns, three subtasks are enabled: WAWF Info, ACRNs, and MILSTRIPs:
The WAWF Info subtask can alert you that the project product bill has already been included in a WAWF file (the Included in WAWF File check box will be selected but can be edited). This feature will help prevent the bill from being included in a file more than once.
Use the ACRNs subtask to enter ACRN information for each line on the invoice. This allows ACRN information to be sent with the invoice in the WAWF file since there is no link in Costpoint between ACRN functionality and project product bills. This subtask represents ACRN detail for one line in the project product bill. You can enter as many lines as you want, but you cannot enter duplicate lines. The total ACRN Amount entered must equal the amount billed on the line.
Use the MILSTRIPs subtask to store MILSTRIP information. This subtask represents MILSTRIP detail for one line on the invoice. The Combo invoice type uses MILSTRIP numbers, although they are not required. Do not enter duplicate MILSTRIP numbers. The MILSTRIP Quantity entered should equal the item quantity for the selected line on the bill.