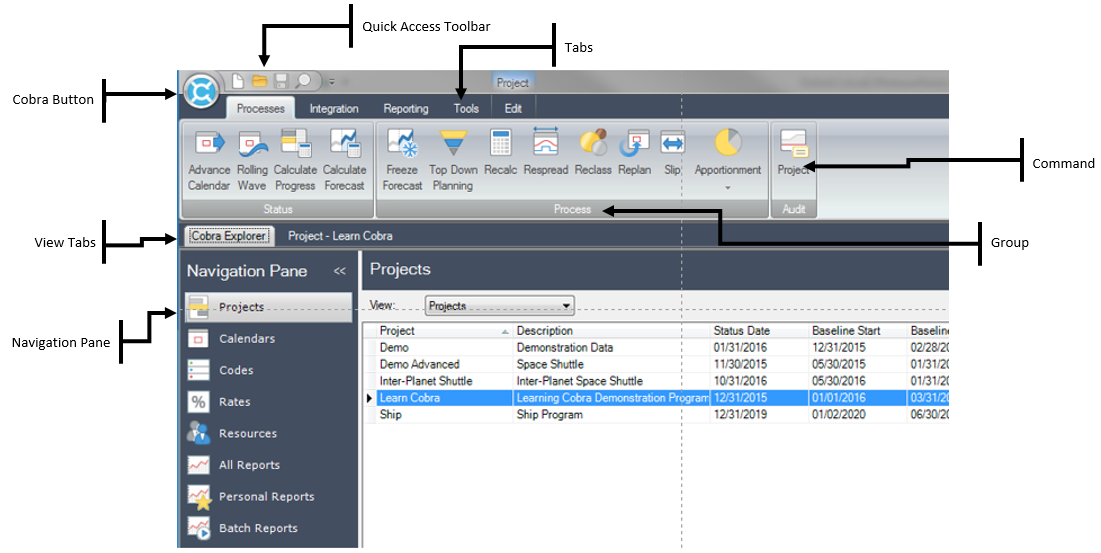
Cobra Explorer
The Cobra Explorer automatically displays when you log on to Cobra.
The left Navigation pane is a menu of data and reports that are available in Cobra. Click on a menu item and see a list of contents in the right pane. For example, select Projects to see a list of all of the projects to which you have access.
If you select Projects, the right pane also displays the View field. Use this field to choose the types of projects that you want to display. For example, if you select Master Projects in the View field, the right pane displays only master projects.
You can add options to the field by adding project-level codes on the Project Codes tab of the Application Preferences dialog box. Cobra displays the Master Project option and up to nine code prompt names.
Right-click anywhere in the right pane to display a shortcut menu containing many of the commands found on the main toolbar. The options listed on the shortcut menu vary depending on whether you are displaying projects, calendars, codes, or another type of data.
Cobra Explorer Areas
Cobra uses the ribbon interface, which display commands in a series of icons stored on different tabs.
Expand and Manage the Viewing Area
You can expand the viewing area by minimizing the Navigation pane. To do this, click
 at the top of the Navigation pane. This will minimize the Navigation pane so that it only displays icons, providing you with a larger viewing area.
You can also change the arrangement of the displayed dialog boxes. To do this, right-click an open file tab and select one of the following options:
| Option | Description |
|---|---|
| Tile Vertically | Arranges the displayed dialog boxes vertically. |
| Tile Horizontally | Arranges the displayed dialog boxes horizontally. |
| Cascade | Arranges the displayed dialog boxes in layered manner, one dialog box on top of another. |
