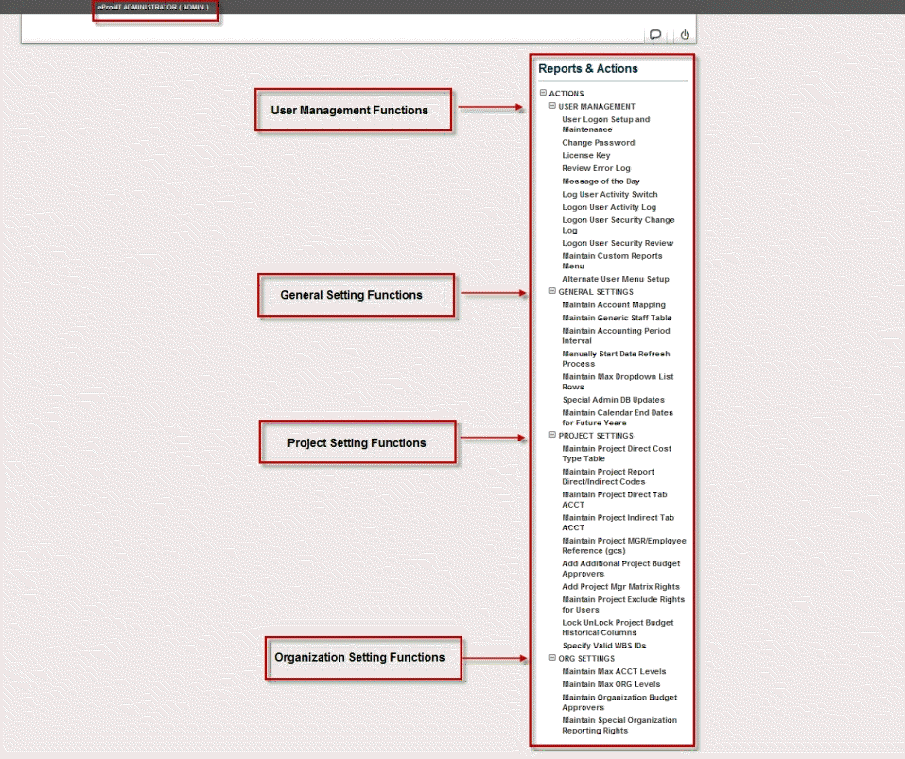
To manage the User Management Settings, complete the following steps:
Enter your Account Name, Logon ID, PIN, and Password in the logon screen.
The Administrator homepage opens showing the Reports & Actions that you have access to.
Select a report or action in Reports & Actions.

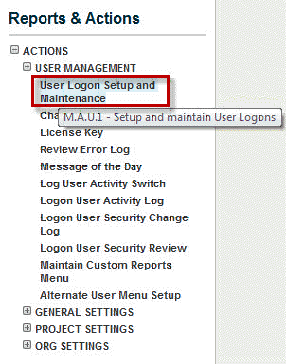
Click to open the dialog box.
The dialog box lists the current logon users on the left.
Click the column headers to sort the column information differently.
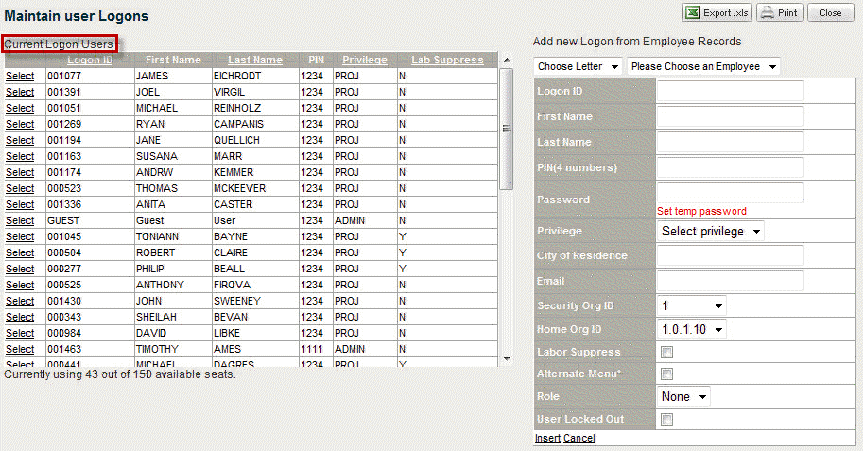
Click Select to edit or delete the information for a specific person.
When you click Select, the fields on the right are populated with current information.
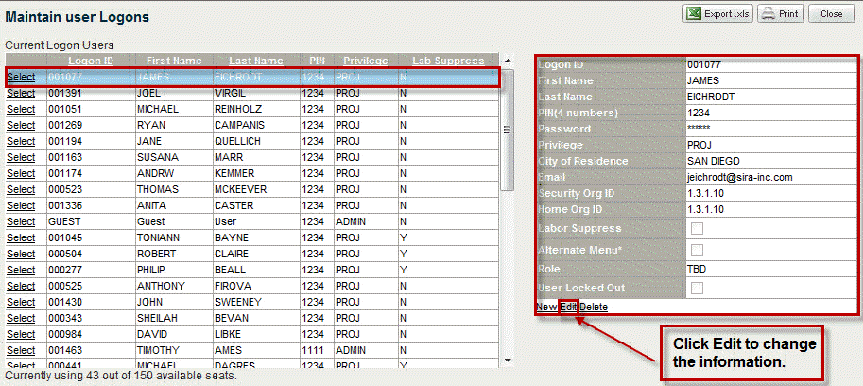
Change any of the information in the fields, as necessary.
Logon ID: do not change this ID because it is linked to the projects the user has rights to see.
First /Last Name: allow you to make name corrections.
PIN/last 4 SSN: the PIN is 4 integers and is a required field.
Password: allows you to assign a temporary password, if needed.
If you don't touch this field, the password created by a current B&P user remains.
If users log in using a temporary password, they are redirected to a page where they are asked to create a new password.
If a password has expired (an additional logon requirement you can request), users are asked to create a new password.
Permanent passwords are encrypted and stored in your B&P database.
If users forget the passwords they create, you must assign them a temporary password before they can login and create a new password.
Privilege: PROJ level has no access to Admin information; ORG level has access to all Org and Project Manager information; ADMIN has access to everything.
City of Residence: allows you to change the city of residence.
Email: allows you to change the email address.
Security Org ID: this drop-down menu lists the org structure you use. The level you choose here gives the user access to that level and any children below that level. (Please see more details of security levels in the Appendix.)
All users populate with same access levels that are defined in your accounting system.
Home Org ID: this choice reflects the organization this user's costs resolve to.
Labor Suppress: click the check box.
If you click the check box, then some labor analysis reports will not be accessible.
Check it if you do not want a user to be able to back into the hourly rates of resources.
Alternate Menu: If click the check box, you are able to restrict what reports and actions the user has access to.
Role: enables you to create a customizable rights setup so that when assigned a role, the user has all the rights of that role, subject to the user's org security.
User Locked Out: Check this box if you want to block a user from accessing B&P.
If a user gets locked out of B&P, clear this box to allow access.
You must delete a user if you want to give their seat to someone else.
Click Update when the changes are complete.
Click the drop-down list on the right to Add an employee from Employee Records.
You can select a letter of the alphabet from the drop-down list on the left to filter the employee list.
If you want to add someone not from employee records, begin typing in the fields with the necessary information.
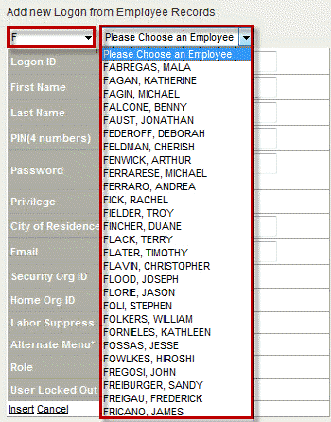
Click Insert when you have filled in the fields.
To add additional password and logon requirements, contact the DELTEK support team. Options include:
Password requires at least 1 alpha character.
Password has a minimum length.
Password requires at least 1 number.
Password requires at least 1 upper case character.
Password requires at least 1 non-alphanumeric character (!@#$%^&*).
Password expires after a certain period of time.
User is unable to logon after a certain number of failed attempts.
History of passwords created is compiled, which prevents users from reusing the same password.
Click the Excel icon to export the user logon information.
Click Close to close the dialog box.